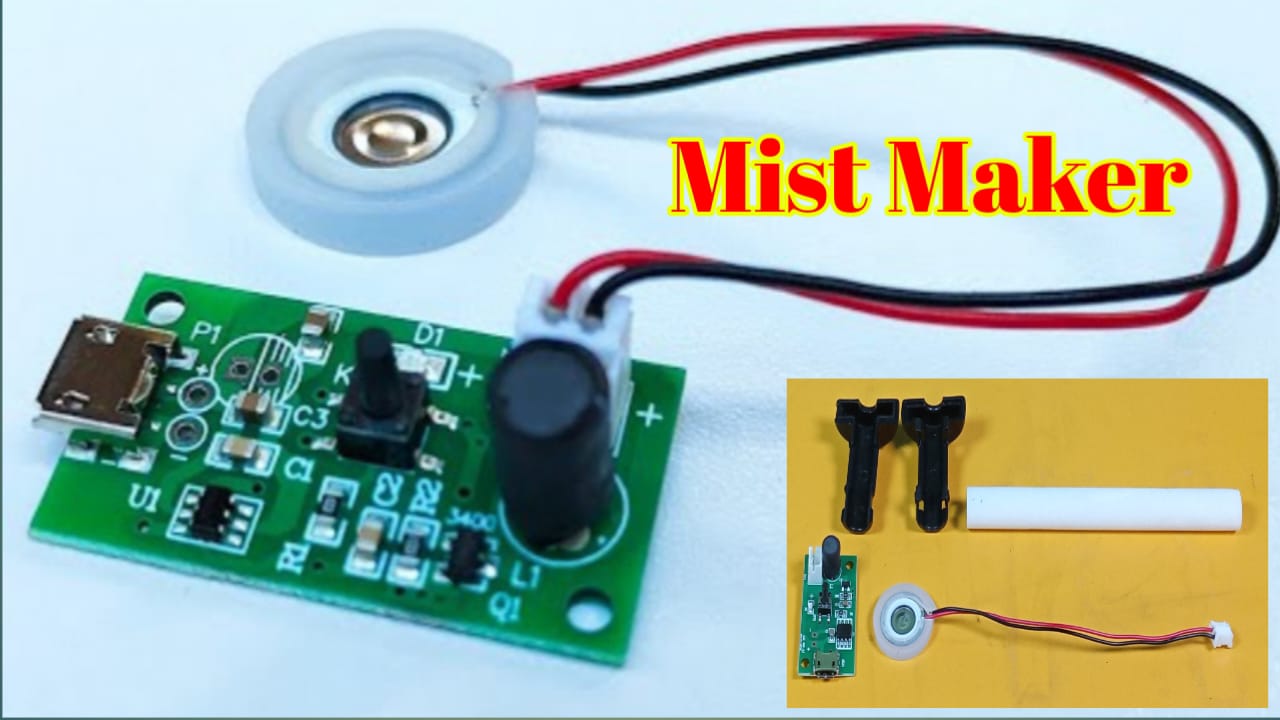
Humidity plays a crucial role in maintaining comfort and health within indoor environments. While commercial humidifiers are readily available, making your own humidifier spray module can be a . In this guide, we’ll walk you through the process of creating a homemade humidifier spray module, suitable for school projects or personal use.
Introduction to Humidifier Spray Module
A humidifier spray module, also known as a mist maker, utilizes ultrasonic technology to break water into fine mist particles, increasing humidity levels in the surrounding area. This DIY project allows you to create a simple yet effective device that can be customized to suit your needs.
Understanding the Components
Before diving into the construction process, it’s essential to understand the basic components of a humidifier spray module:
Water Reservoir
The water reservoir holds the water that will be converted into mist. It should be made of a non-corrosive material such as plastic or glass and should have a capacity suitable for your intended use.
Ultrasonic Atomizer
The ultrasonic atomizer is the heart of the humidifier spray module. It consists of a piezoelectric transducer that vibrates at ultrasonic frequencies, creating pressure waves in the water, which break it into tiny droplets.
Power Source
A power source, such as a DC adapter or batteries, provides the necessary electrical energy to drive the ultrasonic atomizer.

Step-by-Step Guide to Making a Humidifier Spray Module
Gathering Materials
To begin, gather the following materials:
- Water reservoir
- Ultrasonic atomizer module
- DC 5 volt adapter or batteries
- Silicone sealant
- Tubing (optional)
- Container for mist output (optional)
Assembling the Water Reservoir
Start by preparing the water reservoir. Ensure it is clean and free of any contaminants. If needed, drill holes for tubing or mist output.
Installing the Ultrasonic Atomizer
Carefully attach the ultrasonic atomizer module to the bottom of the water reservoir using silicone sealant. Make sure it is securely in place and properly aligned.
Connecting to Power Source
Connect the ultrasonic atomizer module to the power source. If using batteries, insert them into the appropriate compartment. If using a DC adapter, ensure it is compatible with the module’s voltage requirements.
Testing and Troubleshooting
Checking for Leaks
Before powering on the device, perform a thorough inspection to check for any leaks or loose connections. Rectify any issues before proceeding.
Adjusting Mist Output
Once powered on, observe the mist output and adjust settings as needed to achieve the desired humidity level. Experiment with different configurations to optimize performance.
Benefits of Homemade Humidifier Spray Module
Cost-Effectiveness
Building your own humidifier spray module can be significantly more economical than purchasing a commercial unit. Plus, you have the flexibility to customize it according to your preferences.
Customization Options
With a DIY approach, you can tailor the design and features of your humidifier spray module to meet specific requirements. Add features such as LED lights or aromatherapy capabilities for enhanced functionality.
Conclusion
Creating a humidifier spray module at home is a fulfilling and educational project that offers practical benefits. By following this guide, you can build a simple yet effective device to increase humidity levels in your environment, improving comfort and well-being.
Thank you very much visiting for websitehttps://creativitytopper.com
