Wind Turbine Model School project from Cardboard
In today’s world, where renewable energy is becoming increasingly important, understanding how wind turbines work is both educational and inspiring. Building a wind turbine model for a school project is not only a fun and creative activity but also a great way to learn about sustainable energy sources. In this article, we’ll walk you through the process of creating a functional wind turbine model using simple materials like cardboard. Whether you’re a student, a teacher, or a DIY enthusiast, this project is perfect for anyone looking to explore the fascinating world of wind energy.

Why Wind Energy Matters
Before we dive into the project, let’s take a moment to appreciate the significance of wind energy. Wind turbines are one of the most efficient and eco-friendly ways to generate electricity. They convert the kinetic energy of wind into electrical power without emitting greenhouse gases or depleting natural resources. By building a wind turbine model, you’re not just completing a school project—you’re also contributing to a broader understanding of how we can harness nature’s power to create a sustainable future.
Materials You’ll Need
To build your wind turbine model, gather the following materials:
- Cardboard: The main building material for your turbine.
- Scissors or Craft Knife: For cutting cardboard.
- Ruler and Pencil: For measuring and marking.
- Glue or Hot Glue Gun: To assemble the parts.
- Wooden Skewer or Thin Dowel: Acts as the rotor shaft.
- Small Plastic Bottle Cap: Serves as the hub for the blades.
- String or Thin Wire: For additional support or decoration.
- Paint or Markers: To add color and personality to your model.
- Small Electric Motor (Optional): To demonstrate electricity generation.
- LED Light or Small Bulb (Optional): To show how the turbine generates power.
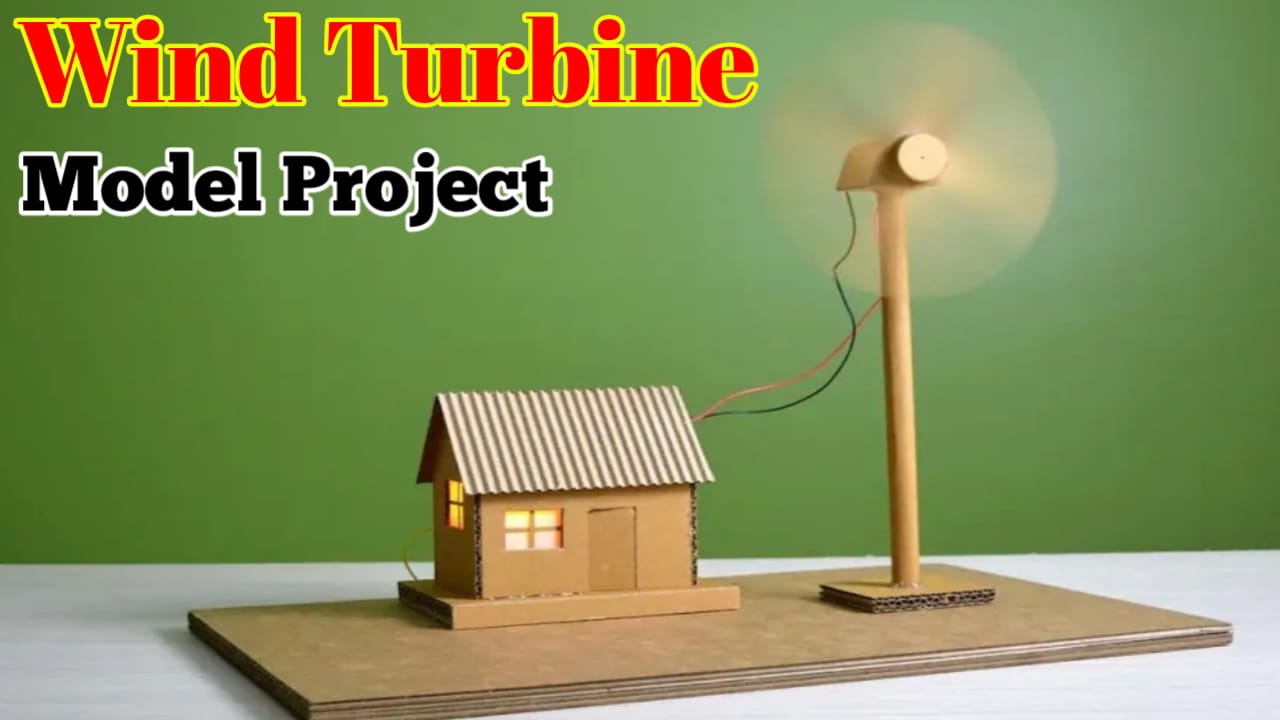
Step 1: Building the Base
The base is the foundation of your wind turbine model. It needs to be sturdy enough to support the tower and blades.
- Cut a rectangular piece of cardboard (approximately 20 cm x 15 cm).
- For added stability, stack and glue two or three layers of cardboard together.
- Decorate the base with paint or markers to make it visually appealing. You can even add miniature trees, grass, or rocks to create a realistic landscape.
Step 2: Constructing the Tower
The tower holds the blades high above the ground, allowing them to catch the wind.
- Cut a long, narrow strip of cardboard (about 25 cm tall and 5 cm wide).
- Roll the strip into a cylinder and glue the edges to form a sturdy tower.
- Attach the tower to the base using glue or tape. Ensure it stands upright and is securely fastened.
Step 3: Designing the Blades
The blades are the most critical part of your wind turbine. They need to be lightweight yet strong enough to spin when exposed to wind.
- Cut out 3 or 4 rectangular pieces of cardboard (about 10 cm long and 3 cm wide).
- Shape the blades by slightly curving one end of each rectangle. This curvature helps the blades catch the wind more effectively.
- Attach the blades to a small plastic bottle cap (the hub) using glue or tape. Space them evenly around the cap to ensure balanced rotation.
Step 4: Assembling the Rotor
The rotor is the part of the turbine that spins, converting wind energy into motion.
- Push a wooden skewer or thin dowel through the center of the bottle cap (hub) to act as the rotor shaft.
- Attach the skewer to the top of the tower. Make sure it can spin freely. You can use a small piece of straw or a bead to reduce friction between the skewer and the tower.
Step 5: Adding a Generator (Optional)
If you want to take your project to the next level, you can add a small electric motor to demonstrate how wind turbines generate electricity.
- Attach the motor to the top of the tower.
- Connect the rotor shaft (skewer) to the motor’s axle using a small piece of rubber or tape.
- Connect the motor to an LED light or small bulb using wires. When the blades spin, the motor will generate electricity, lighting up the bulb.
Step 6: Decorating Your Model
Now that the functional parts are complete, it’s time to let your creativity shine!
- Paint or color the base, tower, and blades to make your wind turbine look more realistic.
- Add details like miniature houses, trees, or animals to the base for a creative touch.
- Use markers to label the parts of your turbine, such as the blades, tower, and base.
Step 7: Testing Your Wind Turbine
The moment of truth has arrived—it’s time to see your wind turbine in action!
- Place your model in front of a fan or blow air toward the blades to make them spin.
- Observe how the blades rotate and, if you added the motor and LED, watch the bulb light up as electricity is generated.
- Experiment with different blade shapes and sizes to see which design works best.
Creating Cardboard Wind Turbines for School Projects
Tips for Success
- Keep It Lightweight: Use lightweight materials for the blades to ensure they spin easily.
- Balance Is Key: Make sure the blades are evenly spaced and balanced to avoid wobbling.
- Experiment and Learn: Try different blade designs and angles to see how they affect the turbine’s performance.
Educational Takeaways
Building a wind turbine model is more than just a craft project—it’s a hands-on learning experience. Here are some key concepts you’ll explore:
- Renewable Energy: Understand how wind turbines harness wind energy to generate electricity.
- Aerodynamics: Learn how blade shape and angle affect the turbine’s efficiency.
- Engineering Basics: Gain insight into the design and construction of mechanical systems.
Thank you very much visiting for website Get More Content Click Here