
Making a paper rose is a fun and creative school project. Here’s a step-by-step guide to help you create a beautiful paper rose
Materials Needed for Paper Rose Flower
- Colored paper (red, pink, yellow, or any color you like)
- Scissors
- Glue or glue stick
- Green paper (for leaves and stem)
- Pencil
- Ruler
- Wooden skewer or straw (for the stem)
Steps to Make a Paper Rose:
1. Prepare the Petals:
- Cut the colored paper into squares. For a medium-sized rose, use squares of about 10 cm x 10 cm.
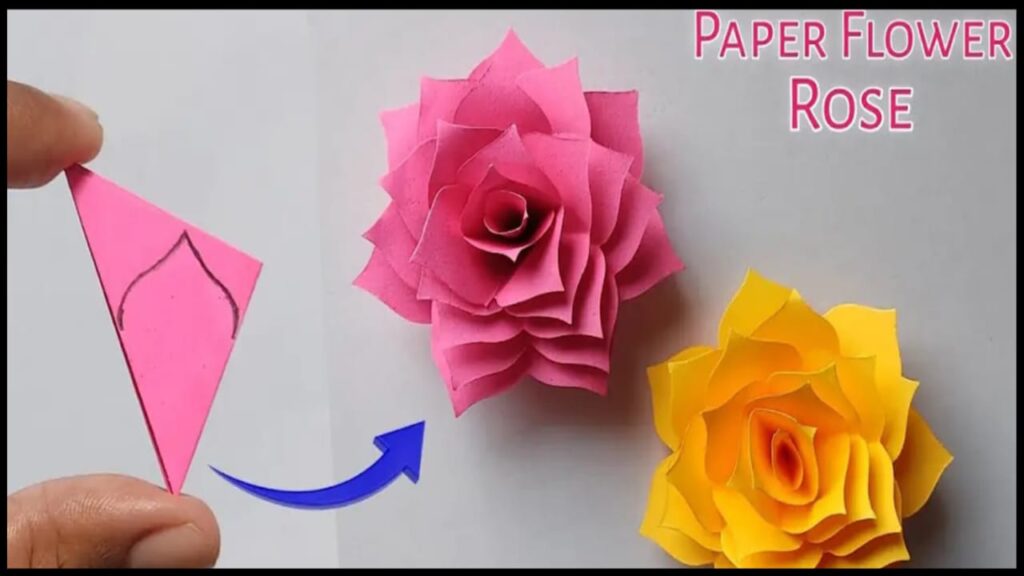
- Fold one square diagonally to form a triangle.
- Fold the triangle in half again to make a smaller triangle.
- Draw a petal shape on the folded paper (like a half-heart shape).
- Cut along the outline and unfold the paper to reveal a flower shape with 4 petals.
- Repeat this process to make 4-6 flower shapes (depending on how full you want your rose).
2. Shape the Petals:
- Take one flower shape and cut out one petal.
- Overlap the edges of the remaining petals and glue them together to form a cone shape.
- Repeat this for all the flower shapes, making each cone slightly smaller than the previous one.
Make Handmade Paper Rose Flower School Project
3. Assemble the Rose:
- Take the largest cone and apply glue to the bottom.
- Insert the next smaller cone inside the first one, aligning the petals.
- Continue adding the cones, one inside the other, until all the layers are glued together.
- Gently curl the edges of the petals outward using a pencil or your fingers to give the rose a natural look.
4. Make the Stem and Leaves:
- Take the green paper and cut a strip about 2 cm wide and 20 cm long.
- Apply glue along one edge of the strip and wrap it tightly around a wooden skewer or straw to create the stem.
- Cut out leaf shapes from the green paper.
- Glue the leaves to the stem.
Make Handmade Paper Rose Flower School Project
5. Attach the Rose to the Stem:
- Apply glue to the base of the rose.
- Attach it to the top of the stem.
- Press gently to secure it in place.
Tips:
- Use different shades of paper for a more realistic look.
- Add glitter or paint for extra decoration.
- Practice cutting and shaping the petals to perfect your design.
Your paper rose is now ready! This project is great for school assignments, gifts, or decorations. Enjoy crafting.
Thank you very much visiting my website Get More Content Click Here