Introduction
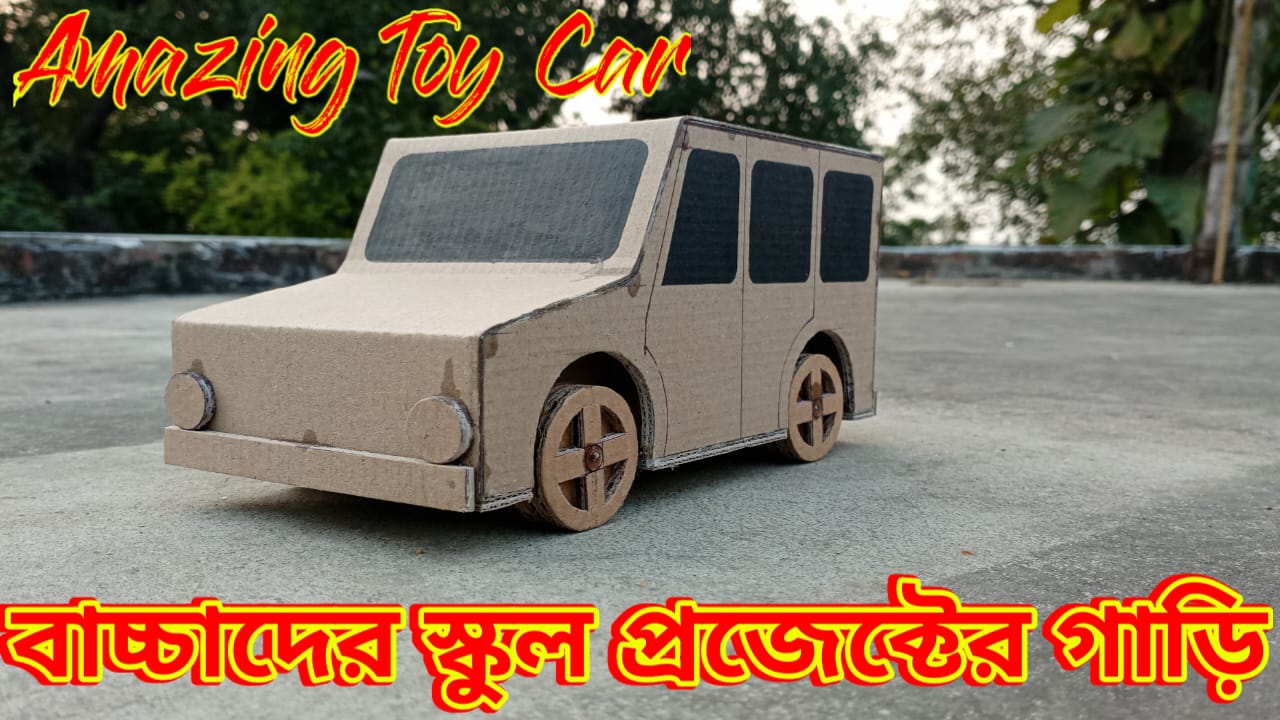
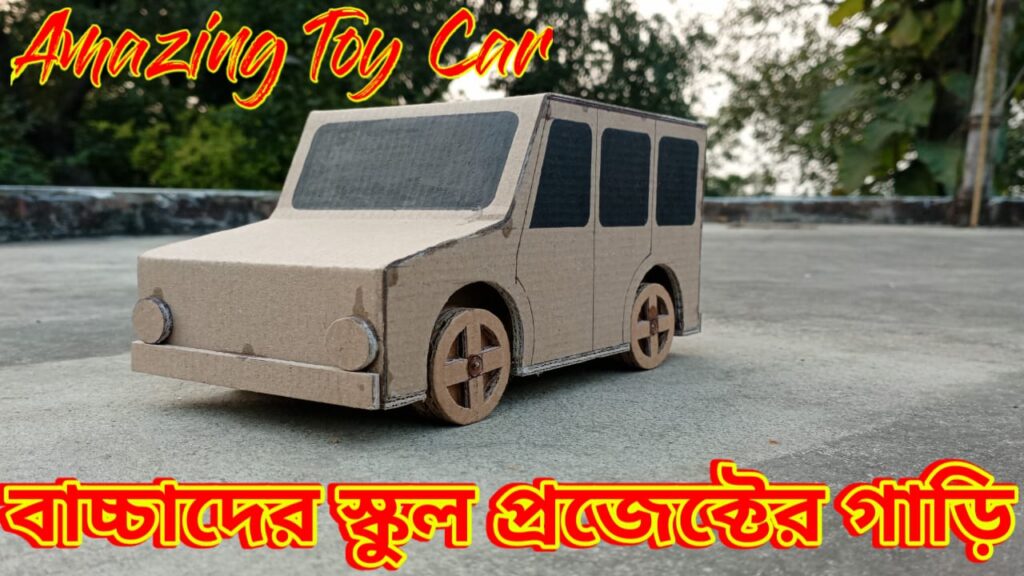
School projects offer a fantastic opportunity for students to unleash their creativity and learn through hands-on experiences. One engaging project that combines fun and learning is creating a toy car from cardboard. In this article, we’ll guide you through the process, providing step-by-step instructions to ensure a successful and enjoyable project.
Materials Needed
Before diving into the project, gather the necessary materials. You’ll need cardboard, scissors, glue, paint, brushes, and, of course, your creative imagination. Each material plays a crucial role in bringing your cardboard toy car to life.
Getting Started
Prepare a dedicated workspace for your project. Clear the area, organize your materials, and ensure you have enough room to work comfortably. This step sets the foundation for a smooth and enjoyable crafting experience.
Designing the Toy Car
Select a design that is both simple and visually appealing. Sketch your chosen design on paper, outlining the key features and dimensions. This step allows you to visualize the final product before diving into the construction phase.
Cutting and Shaping
Effective use of cardboard is essential in creating a sturdy and well-shaped toy car. Follow your design’s outline and use precise cutting techniques. Take your time to ensure accuracy in shaping the main components of the car.
Assembling the Components
Now, it’s time to bring your design to life. Follow a step-by-step process to assemble the main parts of the toy car. Pay special attention to secure and sturdy connections to ensure the longevity of your creation.
Adding Wheels and Axles
Choose appropriate materials for the wheels and attach them securely to the car. Ensure proper rotation for smooth movement. This step adds functionality and realism to your cardboard toy car.
Testing and Troubleshooting
Conduct a test run of your cardboard toy car to identify any issues. Troubleshoot common problems, ensuring that your creation moves smoothly and meets your design expectations.
Showcasing the Project
When presenting your school project, think about how to showcase it effectively. Highlight the creative aspects of your toy car and encourage others to appreciate the effort and ingenuity behind it.
Benefits of DIY Projects
Explore the advantages of hands-on learning. DIY projects, like creating a cardboard toy car, promote creativity and self-expression, fostering a sense of accomplishment in students.
Environmental Considerations
Encourage the use of recycled materials in DIY projects, promoting sustainability. Discuss the eco-friendly aspects of cardboard projects, instilling a sense of responsibility towards the environment.
Conclusion
In conclusion, creating a toy car from cardboard is a rewarding and educational school project. By following these steps, you’ll not only craft a fun toy but also develop valuable skills and unleash your creativity. So, roll up your sleeves, gather your materials, and embark on this exciting DIY adventure
Thank you very much visiting for websitehttps://creativitytopper.com
- How To Make DIY Mini bus Project From Cardboard at home. - May 8, 2024
- How To Make Humidifier Spray Module / Mist Maker Project . - April 27, 2024
- How To Make a New Model Subwoofer Box Project by Cardboard - April 15, 2024