Creating a mini cardboard cricket stadium can be a fun and educational school project. It combines creativity, craft skills, and a love for cricket. This hands-on activity is perfect for students who want to showcase their passion for the sport while learning about construction, symmetry, and presentation.

Materials Needed for Stadium Project
Before starting the project, gather the following materials:
- Cardboard sheets (medium and thick)
- Chart paper (green, white, and other colors)
- Glue or glue gun
- Scissors or a paper cutter (use with adult supervision)
- Scale/ruler
- Compass or round object for circular base
- Pencil and eraser
- Markers, sketch pens, or paint
- Small sticks or toothpicks
- Small cricket figures (can be handmade or printed)
- Netting or mesh (for fencing)
- LED lights (optional for extra effect)
Step-by-Step Instructions
Plan Your Design
Before cutting anything, draw a basic sketch of the stadium on paper. Decide the size of your base, the position of the pitch, the seating stands, and other features like scoreboards or floodlights. Planning helps you stay organized and saves time later.
Create the Base
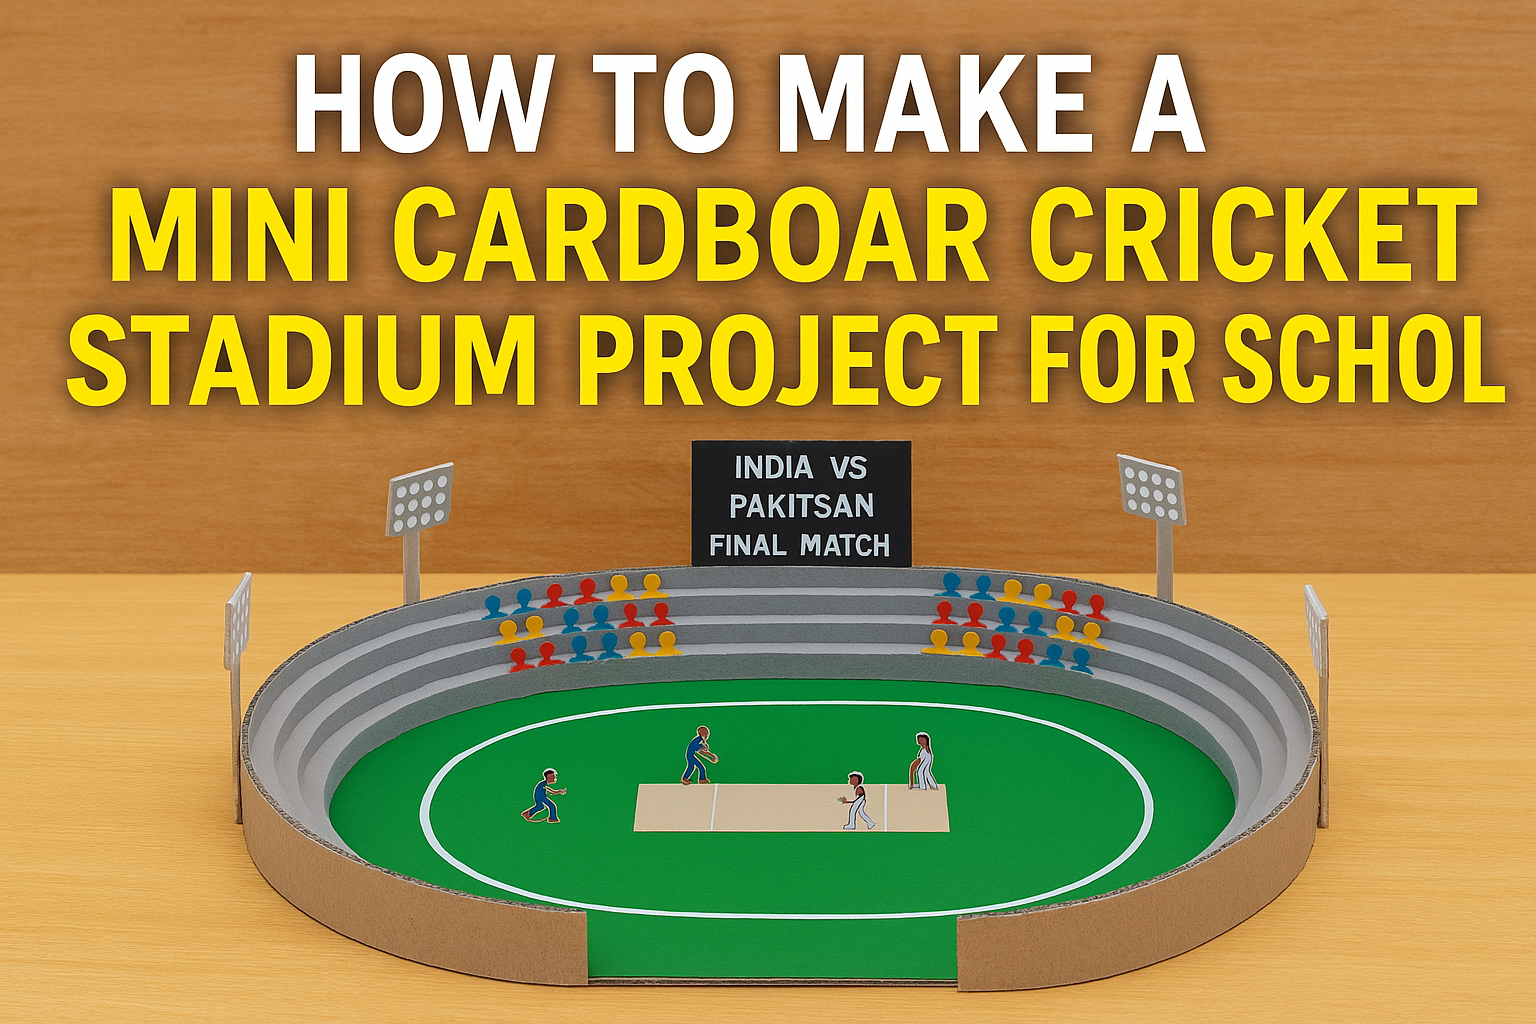
Take a large rectangular piece of cardboard. This will be the base of your stadium. Cover it with green chart paper or paint it green to resemble the grass on the field. If you want a more realistic look, you can use green felt or turf sheet.
Make the Cricket Pitch
Cut a rectangular piece of white or brown chart paper for the pitch. Stick it in the center of the field. You can draw stumps at both ends of the pitch and use tiny sticks to represent wickets. Use a ruler to make sure the pitch is centered and straight.
Construct the Seating Stands
Cut strips of cardboard in different lengths to form seating stands around the field. You can stack smaller pieces of cardboard on top of each other to make tiered stands. Cover them with colored paper or paint them to look like audience seating. Make sure they’re evenly placed on all sides.
You can also draw or stick tiny paper cutouts of people on the stands to create a realistic crowd effect.
Build the Fence or Boundary
Use netting, toothpicks, or matchsticks to make the boundary fence around the field. Glue them carefully around the edges of the field, just inside the seating stands. Make sure it’s neatly aligned to give a professional look.
Add Scoreboard and Dugouts
Use a small rectangular cardboard piece to create a scoreboard. Paint or write match details such as “India vs Pakistan” or “Final Match.” Position it at one end of the stadium.
You can also make small dugouts using cardboard and place them near the boundary line. These represent the player sitting area.
Make the Players
Draw and cut out tiny cricketers using paper or cardboard. You can paint them or print them from the internet. Place batsmen on the pitch, a bowler in action, and fielders around the ground. This makes the model come alive!
You can even make a tiny ball using clay and bats using ice-cream sticks cut into shape.
Floodlights (Optional)
To make your project stand out, add four floodlights in each corner. Use empty pen cases, paper rolls, or straws as poles. Attach small LED lights or cut circles of shiny foil paper to mimic lights. These can be glued to the top of the poles.
Final Touches
Go around the model and fix any loose ends. Make sure all the parts are glued firmly. You can write the name of your stadium on the front, like “Mini Wankhede Stadium” or “XYZ International Cricket Ground.”
Use markers or sketch pens to add details like boundary lines, advertisements, or logos on the ground and walls.
Tips for a Successful Project
- Use a scale for measuring to keep everything symmetrical and balanced.
- Work slowly and allow glue to dry before moving on to the next step.
- Add creativity—use real photos for the crowd, printed logos for sponsors, or mini flags for teams.
- Explain your project—if you have to present it, prepare a small script explaining each part of the stadium.
Educational Value
This project helps students develop multiple skills:
- Creativity and Imagination – Designing and decorating the stadium improves artistic skills.
- Mathematics – Measuring and cutting accurately involves geometry and planning.
- Project Management – Working step-by-step teaches planning, time management, and patience.
- Sports Knowledge – Understanding field layout, player positions, and game rules adds educational value.
Conclusion
Making a mini cardboard cricket stadium is a fun and rewarding school project. With simple materials and a bit of creativity, you can build a model that looks impressive and reflects your love for cricket. Whether it’s for a science exhibition, art class, or a hobby, this project is sure to impress your teachers and classmates.
Thank you very much visiting my website get more Contenthttp://Click Here