Introduction
Are you looking for an exciting and creative school project idea? Why not make an amazing mini rocking chair using cardboard? This project allows you to unleash your creativity, improve your crafting skills, and create a functional piece of furniture. In this article, we will guide you through the step-by-step process of making a mini rocking chair using cardboard. So grab your materials, put on your crafting hat, and let’s get started .
1. Materials Needed
To begin with, gather the following materials:
- Cardboard sheets
- Utility knife or scissors
- Ruler
- Pencil
- Hot glue gun or strong adhesive
- Paint and brushes (optional)
- Decorative materials (ribbons, buttons, etc.)
2. Planning and Designing
Before you start cutting the cardboard, it’s important to plan and design your mini rocking chair. Consider the dimensions, shape, and style you want to achieve. You can draw a rough sketch or use online templates for reference.
3. Cutting the Cardboard Pieces
Using a ruler and pencil, mark the dimensions of the chair’s base, backrest, armrests, and other necessary components on the cardboard sheets. Carefully cut along the marked lines using a utility knife or scissors. Take your time to ensure clean and accurate cuts.
4. Assembling the Chair Base
Begin assembling the mini rocking chair by joining the cardboard pieces for the base. Apply adhesive along the edges and securely attach them together. Use clamps or heavy objects to hold the pieces in place while the glue dries.
5. Building the Backrest
Attach the cardboard piece cut for the backrest to the base using adhesive. Make sure it is properly aligned and firmly secured. You can reinforce the attachment by adding extra adhesive or using supportive braces.
6. Creating the Armrests
To make the armrests, cut and shape two pieces of cardboard to the desired size and form. Attach them to the sides of the backrest and base using adhesive. Ensure they are symmetrical and provide enough support for the user’s arms.
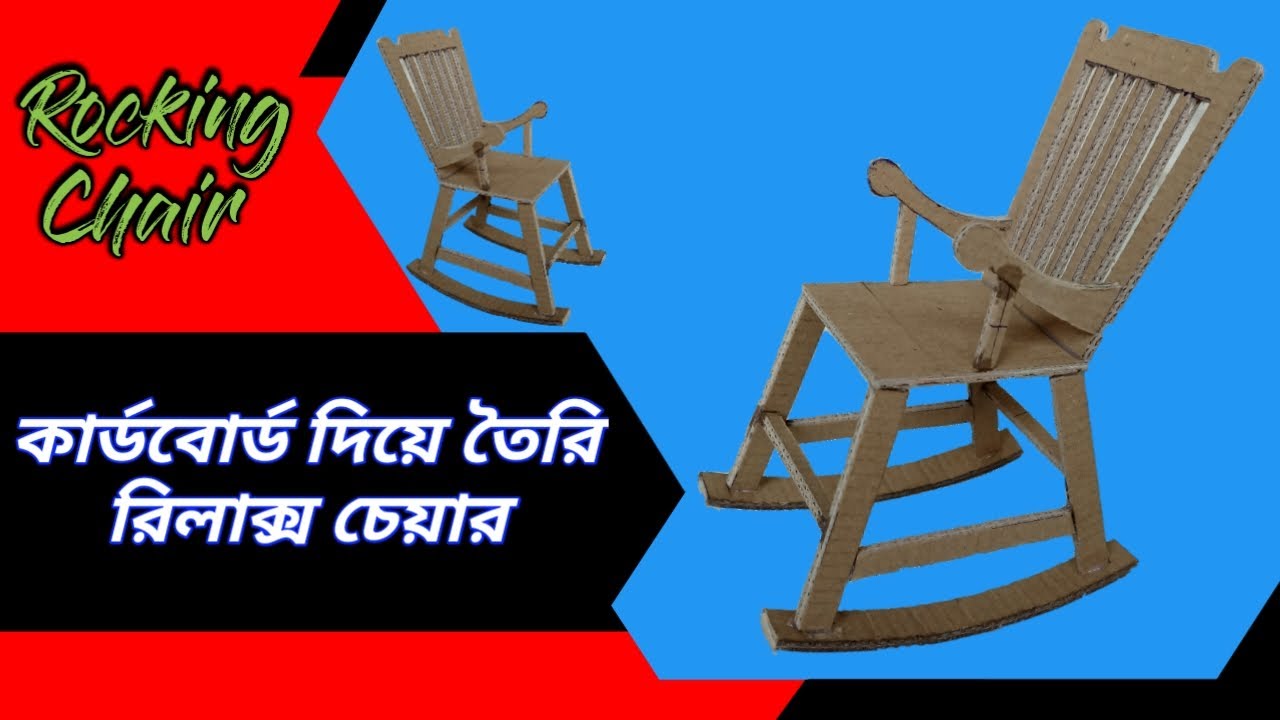
Make a School Project Mini Rocking Chair Using by Cardboard.
7. Adding Stability and Reinforcement
To enhance the stability of the mini rocking chair, reinforce critical joints and areas with additional cardboard pieces. This will prevent the chair from collapsing or breaking when in use. Apply adhesive and press the pieces firmly together.
8. Finishing Touches
Smooth out any rough edges or surfaces using sandpaper or a file. This will give your mini rocking chair a polished and professional look. Pay attention to details and make any necessary adjustments to ensure a comfortable and aesthetically pleasing design.
9. Painting and Decorating
Now comes the fun part! You can paint your mini rocking chair using acrylic or spray paint. Choose colors that complement your personal style or match your room decor. Add decorative elements such as ribbons, buttons, or stickers to make it unique and eye-catching.
10. Testing and Rocking
Before declaring your project complete, it’s important to test the stability and functionality of the mini rocking chair. Place it on a flat surface and gently rock back and forth to ensure it can support weight and move smoothly.
11. Safety Precautions
When working with tools and adhesives, always prioritize safety. Use a sharp utility knife with caution, avoid sharp edges, and handle hot glue guns carefully. If you’re working on this project with children, supervise them closely and provide guidance to prevent accidents.
12. Tips and Tricks
- Consider using corrugated cardboard for added strength and durability.
- Apply multiple layers of adhesive to strengthen the joints.
- Add foam or cushioning to the seat for extra comfort.
- Experiment with different shapes and designs to create a personalized rocking chair.
Conclusion
Making an amazing mini rocking chair using cardboard is a rewarding and enjoyable school project. By following the step-by-step process outlined in this article, you’ll be able to create a functional piece of furniture that showcases your creativity and craftsmanship. Remember to prioritize safety, have fun with the design, and personalize your rocking chair to make it truly unique.
Thank you very much Visiting My Websitehttps://creativitytopper.com