Introduction
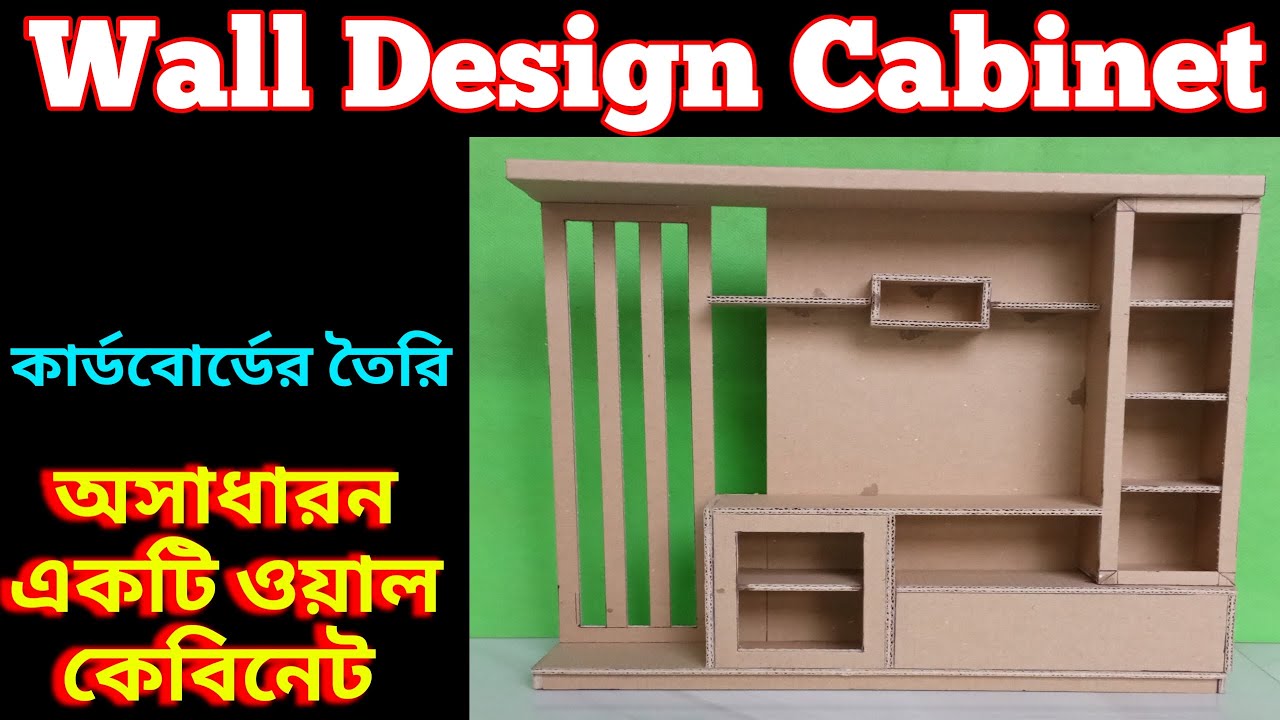
In this article, we will explore the creative process of making an amazing school project wall cabinet design using cardboard. Cardboard is a versatile and easily accessible material that can be transformed into various structures, including a functional wall cabinet. By following the step-by-step guide provided below, you will be able to create a unique and visually appealing cabinet to showcase your school projects.
1. Materials Needed
To create your school project wall cabinet, gather the following materials:
- Cardboard sheets
- Ruler
- Pencil
- Box cutter or scissors
- Glue or adhesive tape
- Measuring tape
- Paint and brushes (optional)
- Decorative materials (optional)
2. Planning and Designh
Before starting the construction process, it’s essential to plan and design your wall cabinet. Consider the available space, the number of shelves and compartments needed, and any additional features you want to incorporate. Sketch a rough layout to guide you throughout the project.
3. Measuring and Cutting the Cardboard
Using your measuring tape, determine the dimensions of each section of the cabinet. Mark the measurements on the cardboard sheets and carefully cut them using a box cutter or scissors. Ensure the pieces are accurate and fit together seamlessly.
4. Assembling the Cabinet
Begin by assembling the main structure of the cabinet. Apply glue or adhesive tape to the edges of the cardboard pieces and join them together according to your design. Use binder clips or heavy objects to hold the pieces in place while the adhesive dries.
Make Handmade School Project Wall Cabinet Design using Cardboard.
5. Reinforcing the Structure
To strengthen the cabinet, add additional layers of cardboard to the corners and edges. Cut the cardboard into strips and glue them over the joints, creating a sturdy framework. This reinforcement will ensure the longevity of your wall cabinet.
6. Adding Shelves and Dividers
Measure and cut more pieces of cardboard to create shelves and dividers within the cabinet. Attach them securely using glue or adhesive tape. Ensure the shelves are level and capable of supporting the weight of your school projects.
7. Decorating and Painting
Now comes the fun part – decorating and painting your wall cabinet. Use paints, markers, or decorative materials to give your cabinet a personal touch. You can add patterns, quotes, or colorful designs to make it visually appealing.
8. Mounting the Cabinet on the Wall
Once your cabinet is complete and fully dry, it’s time to mount it on the wall. Locate a suitable spot and use screws or brackets to secure the cabinet firmly. Ensure it is level and stable before placing any items inside.
9. Maintenance and Care
To maintain the longevity of your school project wall cabinet, keep it away from moisture and direct sunlight. Regularly clean it with a dry cloth or a mild detergent solution to remove dust and stains. Handle the cabinet with care to prevent any damage.
Conclusion
Creating an amazing school project wall cabinet design using cardboard allows you to showcase your projects in an organized and visually appealing manner. By following the step-by-step process outlined above, you can unleash your creativity and construct a unique cabinet that reflects your personal style.
Thank you very much visiting for Website http://creativitytopper.com
- How To Make DIY Mini bus Project From Cardboard at home. - May 8, 2024
- How To Make Humidifier Spray Module / Mist Maker Project . - April 27, 2024
- How To Make a New Model Subwoofer Box Project by Cardboard - April 15, 2024