
Introduction
A water cooler is a common household appliance that cools drinking water using refrigeration or thermoelectric technology. In this science project, we will build a simple thermoelectric water cooler using a Peltier module, which operates on the principle of the Peltier effect—a phenomenon where an electric current creates a temperature difference between two sides of the module.
Materials Required for Water Cooler Project
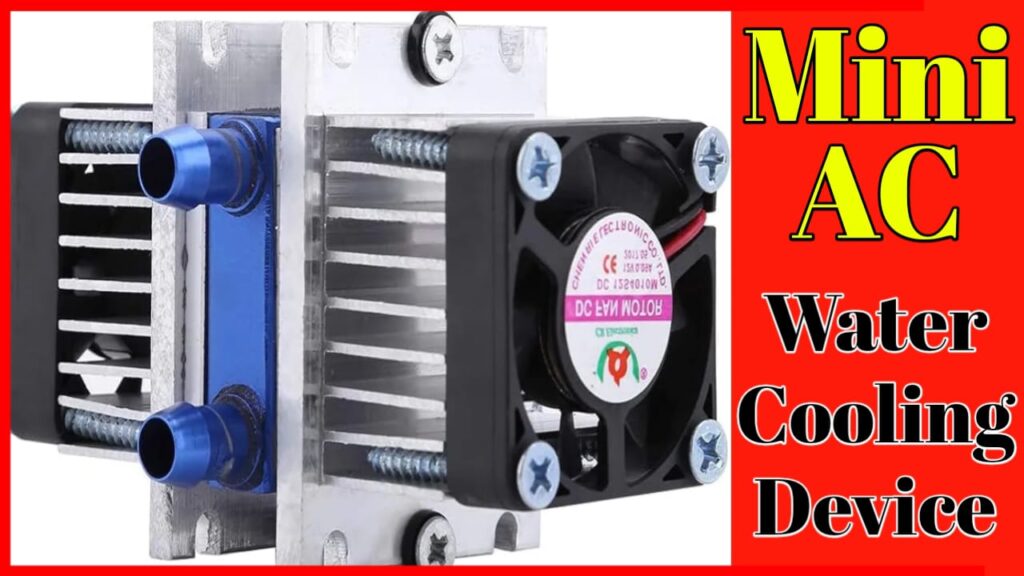
- Peltier Module (TEC1-12706 or similar) – The main cooling component.
- Heat Sink with Fan – To dissipate heat from the hot side of the Peltier.
- DC Power Supply (12V, 5-10A) – To power the Peltier module.
- Small Water Container or Copper Coil – To hold/cool the water.
- Thermal Paste – For better heat conduction.
- Insulating Material (Styrofoam or Thermocol) – To reduce heat loss.
- Temperature Sensor (Optional) – To monitor cooling efficiency.
- Wires, Switch, and Connectors – For electrical connections.
- Small Pump (Optional) – For circulating water.
Peltier Module Working Principle
The Peltier module works on the Peltier effect.
- When DC current is applied, one side of the module becomes cold, and the other side becomes hot.
- The cold side absorbs heat from the water, cooling it down.
- The hot side must be actively cooled using a heat sink and fan to maintain efficiency.
This process is not as efficient as traditional refrigeration but is simpler and requires no moving parts (except the fan).
How to Make a Water Cooler Project Using a Thermoelectric Peltier Module
Step-by-Step Construction
Step 1: Assemble the Cooling Unit
- Attach the Peltier Module:
- Apply thermal paste on both sides of the Peltier module.
- Place the cold side (usually marked) facing the water container or cooling chamber.
- Attach the hot side to a large heat sink with a fan to dissipate heat.
- Build the Cooling Chamber:
- Use a small copper coil or metal container to hold water in contact with the cold side.
- If using a coil, ensure maximum surface contact with the Peltier.
- Wrap the cooling chamber with insulating material (Styrofoam) to prevent heat exchange with the surroundings.
Step 2: Electrical Connections
- Connect the Peltier module to a 12V DC power supply (a battery or adapter).
- Connect the heat sink fan to the same power source (use a separate 5V supply if needed).
- Add a switch to control the power.
How to Make a Water Cooler Project Using a Thermoelectric Peltier Module
Step 3: Test the Thermoelectric Peltier Module system
- Pour a small amount of water into the cooling chamber.
- Turn on the power and observe the temperature drop over time.
- Use a thermometer to measure the cooling rate.
Expected Results & Observations by Water Cooler Project
- The water temperature should drop by 5-10°C within 10-15 minutes, depending on the Peltier’s efficiency.
- The hot side will get very warm, so proper heat dissipation is crucial.
- The cooling effect is limited by the Peltier’s power and heat sink efficiency.
Improvements & Extensions
- Use a Larger Heat Sink or Water Cooling – Improves heat dissipation.
- Add a Water Pump – Circulates water for faster cooling.
- Use Multiple Peltier Modules – Increases cooling capacity.
- Integrate a Temperature Controller – Automates cooling based on sensor input.
Conclusion
This thermoelectric water cooler project demonstrates how electricity can be used for cooling via the Peltier effect. While not as powerful as compressor-based coolers, it is a great educational experiment to understand thermodynamics, heat transfer, and energy conversion.
Thank you very much visiting my website Get More Contenthttp://Click Here