
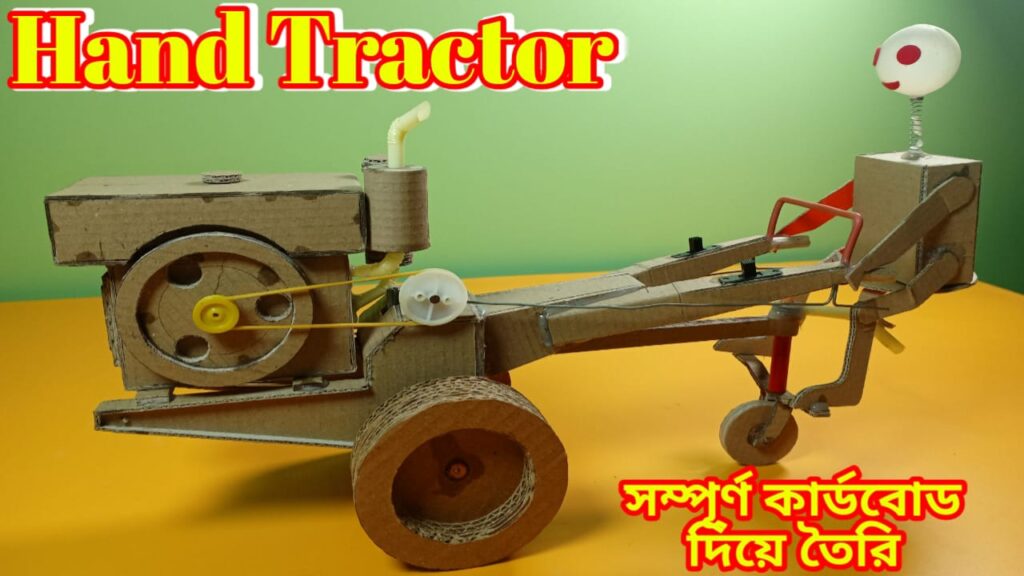
DIY projects are not only fun and rewarding but also practical solutions for various needs. One such project that combines creativity with utility is building a DIY mini hand tractor from cardboard. In this article, we’ll guide you through the process of creating your own mini hand tractor, step by step.
Materials Required
Before diving into the construction process, gather the following materials:
- Cardboard sheets
- Scissors or utility knife
- Glue or adhesive tape
- Wooden dowels or sticks
- Four small wheels
- Axles
- Ruler
- Marker
- Optional: Paints or decorations for customization
Tools Needed
Ensure you have the necessary tools for this project:
- Scissors or utility knife for cutting cardboard
- Glue or adhesive tape for assembly
- Safety gloves and goggles for protection
- Marker for marking measurements
- Ruler for precise cutting
Safety precautions are crucial when handling sharp tools and materials, so always wear appropriate protective gear.
Step-by-Step Instructions
- Creating the Frame: Start by cutting out pieces of cardboard to form the base, sides, and front panel of the tractor. Use the marker and ruler to measure and cut with precision. Assemble the pieces using glue or adhesive tape to form a sturdy frame.
- Attaching Wheels and Axles: Once the frame is ready, attach the wheels to the base using axles. Ensure that the wheels are securely fastened and can rotate smoothly for efficient movement.
- Adding a Handle: Cut a piece of cardboard to create a handle for the tractor. Attach it to the front panel, allowing enough space for comfortable gripping and maneuvering.
- Securing the Structure: Strengthen the joints and connections with additional layers of cardboard or reinforcing materials. This will enhance the stability and durability of the hand tractor.
Tips for Efficiency
- Reinforce critical areas with extra layers of cardboard for added strength.
- Use lightweight but sturdy materials for optimal performance.
- Experiment with different wheel sizes and designs to find the most suitable configuration.
Benefits of DIY Hand Tractor
Building your mini hand tractor offers several advantages:
- Cost-effectiveness compared to purchasing a commercial tractor.
- Customization options to tailor the design to your specific needs and preferences.
Applications of Mini Hand Tractor
Once completed, your DIY hand tractor can assist with various tasks such as:
- Tilling soil in small garden plots
- Transporting lightweight materials
- Assisting with DIY projects around the house
Maintenance and Care
To ensure the longevity of your hand tractor, follow these maintenance tips:
- Keep the tractor clean and free of debris to prevent damage.
- Check for loose parts or signs of wear regularly and repair as needed.
Safety Measures
When using the hand tractor, remember to:
- Operate it in a safe and controlled manner, especially around others.
- Avoid overloading the tractor beyond its capacity to prevent accidents.
Personal Experience/Testimonial
Building a mini hand tractor was not only a rewarding DIY project but also a practical solution for my gardening needs. With minimal materials and effort, I was able to create a functional tool that greatly simplified tasks in my garden.
Inspiring Others
I encourage you to embark on similar DIY projects and unleash your creativity. Not only are they cost-effective and environmentally friendly, but they also provide valuable hands-on learning experiences.
Conclusion
Embarking on DIY projects like building a mini hand tractor not only fosters creativity and problem-solving skills but also offers practical solutions for everyday tasks. By utilizing simple materials like cardboard, you can create functional tools that enhance efficiency and sustainability in various contexts.
Thank you very much visiting for Websitehttps://creativitytopper.com
- How To Make DIY Mini bus Project From Cardboard at home. - May 8, 2024
- How To Make Humidifier Spray Module / Mist Maker Project . - April 27, 2024
- How To Make a New Model Subwoofer Box Project by Cardboard - April 15, 2024