
Creating a horse cart model using ice cream sticks is a fun and creative school project that combines art, craft, and imagination. This project not only helps in developing fine motor skills but also encourages children to recycle materials and use them in a creative way. With a few simple materials and a little patience, you can make a beautiful and realistic horse cart that will impress your teachers and classmates. Here’s a step-by-step guide to making your own horse cart using ice cream sticks.
Materials Needed For Horse Car project
- Ice cream sticks (around 30–40)
- Fevicol or hot glue gun
- Small plastic or wooden wheels (4 pieces)
- Cardboard
- Scissors or cutter
- Pencil and ruler
- Black sketch pen or paint
- Acrylic paint or markers (optional for decoration)
- Toy horse or a horse cutout (you can also make one using cardboard)
Step-by-Step Instructions
Create the Cart Base
Start by laying out 8–10 ice cream sticks side by side to form a flat rectangle. This will be the base of the cart. Stick them together by placing two ice cream sticks horizontally across them and gluing them in place to hold the structure together. Let it dry for a few minutes.
Build the Sides of the Cart
For the side walls of the cart, take 4 sticks for each side and glue them vertically. Then, attach the side walls to the base using glue. Make sure the sticks are aligned properly and stand upright. You can add small vertical sticks on the corners to provide support.
Add the Front and Back Walls
Repeat the same process to make the front and back walls of the cart. Use 3–4 sticks for each side and glue them in place. Once all sides are attached, you will have a box-like structure.
Attach the Wheels
To make the cart mobile, attach 4 small wheels to the bottom of the cart. You can use plastic wheels from an old toy or make wheels using thick cardboard. Glue them on carefully so that they are evenly aligned. If the wheels are not moving, it’s still okay – it will look realistic enough for the project.
Create the Seat and Handle
For the seat, glue 2–3 sticks across the front part of the cart to create a small bench. Then, use 2 ice cream sticks to make the handle that connects the cart to the horse. Glue these sticks extending from the front wall of the cart.
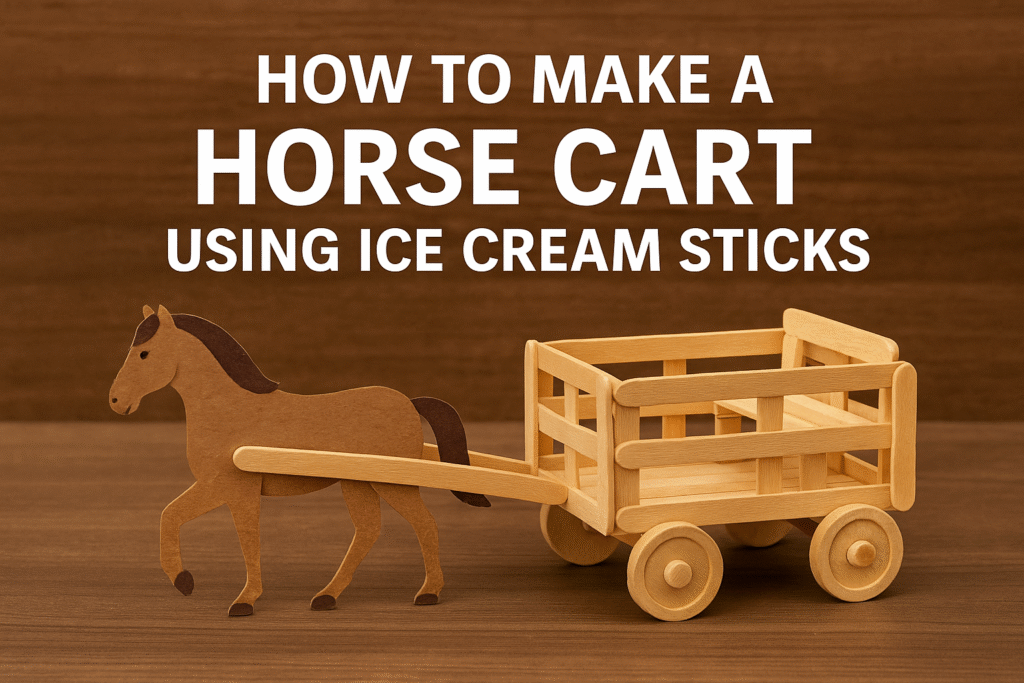
Make Horse Car using Ice Cream Sticks For School Project
Decorate the Cart
Now that the structure is complete, you can paint the cart using acrylic colors or decorate it with colored markers. Add borders, designs, or even tiny flowers to give it a traditional look. You can also use a sketch pen to add wooden textures for a more realistic effect.
Making the Horse
You can use a small toy horse if you have one. If not, draw a horse shape on cardboard, cut it out, and paint it. Attach it to the cart using the handle sticks you made earlier. Make sure the horse is standing upright and facing forward.
Final Touches
After everything is dry, check if all parts are firmly attached. You can add small accessories like sacks, a miniature umbrella, or tiny passengers made of clay or paper to make your cart look lively.
Conclusion
Making a horse cart with ice cream sticks is a great way to showcase creativity and craftsmanship. It’s easy, affordable, and a great way to reuse materials. This model can be used in school exhibitions, craft competitions, or as a fun weekend project. With a bit of imagination and effort, you can create a beautiful horse cart that will surely grab everyone’s attention.
Thank you very much visiting my website get more Contenthttp://Click Here