
Introduction
Ever wondered how electricity is generated? With this fun and hands-on school project, you can actually build your own mini generator using a simple DC motor! It’s a great way to understand the basics of electricity, engineering, and renewable energy. Plus, it’s super cool to say, “I made a generator!”
Materials Required
Here’s what you’ll need to build your mini generator:
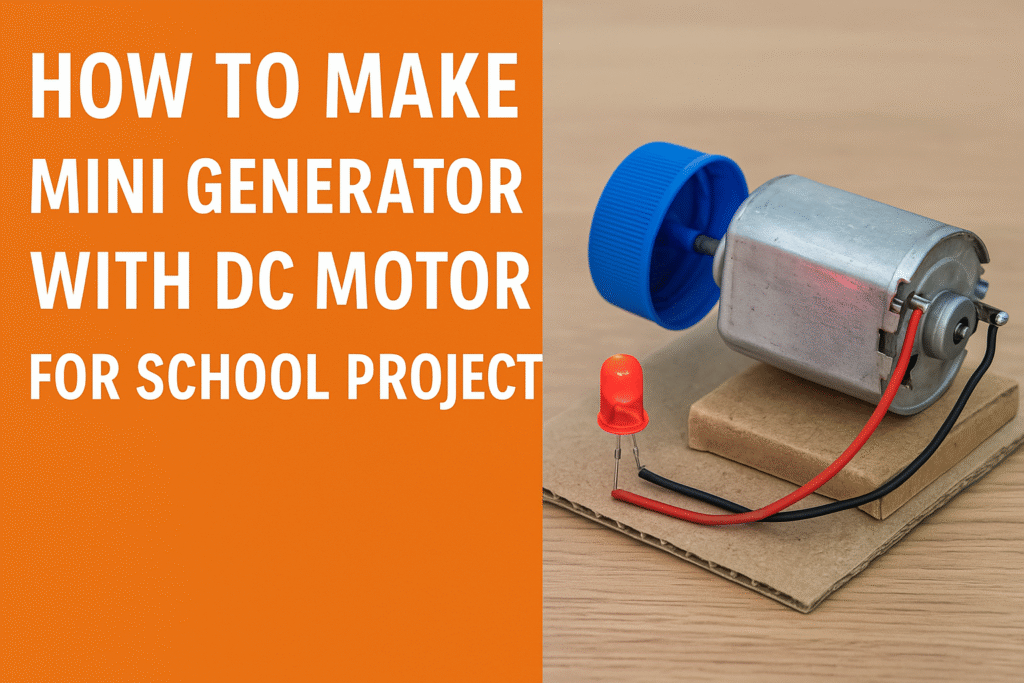
- 1 Small DC Motor (6V is ideal)
- 1 LED bulb (any color)
- A few pieces of wire (stripped at both ends)
- Hot glue or tape
- Cardboard or plastic for mounting
- Bottle cap or small gear for crank
- Scissors or cutter (use with care!)
- Multimeter (optional, for testing voltage)
You can find most of these items at home, a hardware store, or online.
Understanding the Concept
A DC motor doesn’t just run on electricity—it can also produce electricity when manually rotated. This is thanks to electromagnetic induction, a principle discovered by Michael Faraday. When you spin the motor’s shaft, it moves magnets inside, which generates a small current.
Safety First
Before jumping in, let’s talk safety:
- Be careful when using sharp tools like scissors or cutters.
- Always ask an adult for help if you’re unsure.
- Don’t try this with big batteries or large motors—they can be dangerous.
Step-by-Step Guide to Building a Mini Generator
Gather All Materials
Place everything on a clean workspace. Double-check your list to make sure you’re not missing anything.
Connect the Wires
Take two wires and connect them to the terminals of the DC motor. Make sure the wires are tightly wrapped or soldered for better connection.
Attach the LED
Now, attach the other ends of the wires to your LED bulb. Be sure to match the positive and negative sides properly (longer leg of LED is usually positive).
Create a Hand Crank
Glue a bottle cap or small gear to the motor shaft. This will act as a crank handle so you can manually turn it.
Mount the Motor
Use cardboard or plastic to make a stand for your motor. Glue it down so it doesn’t move when you turn the crank.
Testing the Generator
Time for the magic! Slowly rotate the crank. If everything is connected correctly, the LED should light up. If it doesn’t:
- Check all wire connections
- Try rotating faster
- Make sure the LED isn’t damaged
Creative Variations
Want to make it even cooler? Try these:
- Wind Generator: Add a fan blade to make it wind-powered
- Water Wheel: Use water flow to spin the motor
- Bicycle Dynamo Style: Mount it on a toy car’s wheels
Applications of Mini Generators
This tiny project mirrors what happens in big hydro and wind power stations. You’re learning real-world science in miniature form!
Benefits of This Project
- Learn how energy is created and used
- Practice basic electrical engineering
- Improve creativity and problem-solving
- Gain confidence in DIY projects
Tips for Presenting Your Project
- Use a clean board to explain how it works
- Label your components clearly
- Practice a short explanation to tell judges or your class
Conclusion
So there you have it—a working mini generator made from a simple DC motor! You just recreated what giant power stations do on a small scale. Cool, right? This isn’t just a school project; it’s a stepping stone to understanding the world of energy, mechanics, and invention. Keep experimenting and who knows—you might invent the next big thing.
Thank you very much visiting my website get more contenthttp://Click Here