
How To Make Car Parking Lift Using DC Motor For School Project
Introduction
Why Choose a Car Parking Lift as a School Project?
Looking for a fun, functional, and impressive school project? A car parking lift powered by a DC motor is a cool way to explore mechanical and electrical concepts while building something that actually moves! It combines creativity, problem-solving, and hands-on engineering.
Benefits of Using a DC Motor
DC motors are easy to work with, widely available, and perfect for beginners. They’re great for projects that involve rotation or lifting. Plus, they run on low voltage, which makes them safer for school-level experiments.
Understanding the Basics
What is a Car Parking Lift?
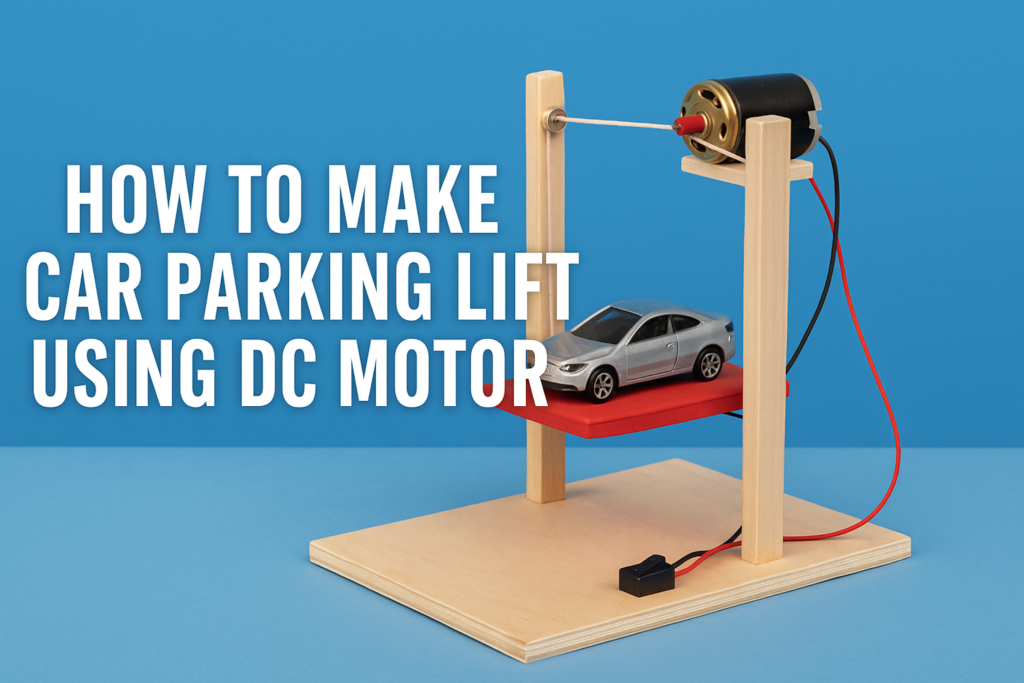
It’s a mini version of a real-life car parking lift system that lifts vehicles vertically to save space. In our case, it’ll lift a toy car or a small platform using a motor-driven pulley system.
Role of a DC Motor in the Lift System
The DC motor powers the lift. When connected to a pulley system, it rotates to pull the platform up and down, simulating an actual car lift mechanism.
Required Materials and Tools
Main Components
- DC Motor (6V or 12V)
- Pulleys and Belts
- Wooden or Plastic Platform/Base
- Rope or Thread (strong enough to hold the platform)
- Switches and Battery Holder
- Wires, Screws, Nuts, and Bolts
Tools Needed
- Hot glue gun or screwdriver
- Wire stripper
- Small drill or hand tools
Designing the Lift
Sketching the Layout
Before building, sketch how your parking lift will look. Include the base, vertical supports, platform, pulley location, and motor placement.
Choosing the Right Scale
Make sure the dimensions fit your available materials and motor strength. Use toy cars or small objects to match the scale.
Building the Base Structure
Creating a Stable Foundation
Use a wooden board or thick plastic sheet as the base. Make sure it’s large enough to hold the entire lift structure without tipping over.
Attaching Vertical Supports
Fix two vertical rods or supports at the back of the base using screws or glue. These will guide the platform’s movement.
Installing the DC Motor
Wiring and Power Supply
Connect the DC motor wires to a switch and a power source like a 9V battery. Use a battery holder for safety and neatness.
Securing the Motor to the Frame
Fix the motor to the top of the structure using clamps or glue. Make sure it’s aligned properly to pull the thread without jerks.
Assembling the Pulley System
Connecting the Platform to the Pulley
Tie strong thread from the platform to the pulley. When the motor turns, the thread winds around the pulley, lifting the platform.
Ensuring Smooth Movement
Make sure the thread runs smoothly through the pulleys and doesn’t get tangled. Use additional pulleys if needed for guidance.
Connecting the Motor to the Pulley
Testing Motor-Pulley Interaction
Turn on the motor briefly to test the movement. Adjust the alignment if the thread slips or the platform tilts.
Adjusting Tension for Smooth Operation
Make sure the rope/thread is taut but not too tight. This helps the platform move evenly without jerks.
Electrical Setup
Connecting to Battery or Power Source
Use a 9V battery or similar low-voltage source. Connect positive and negative wires correctly to avoid short circuits.
Using Switches for Control
Add a simple on-off switch between the motor and power source to easily control the lift movement.
Safety Measures
Insulating Wires
Wrap all connections with electrical tape to prevent shocks or short circuits.
Balancing the Platform Load
Don’t place heavy or unbalanced items on the lift. It can damage the motor or cause tilting.
Testing the Lift
Initial Dry Run
Before loading anything, test the motor and pulley system empty to ensure smooth operation.
Lifting Light Objects (Toy Cars)
Place a toy car or small object on the platform. Turn the switch on to watch your DIY lift in action!
Troubleshooting Common Issues
Motor Not Running
Check power supply, switch, and motor wires. Make sure connections are secure.
Platform Not Lifting Evenly
Adjust the rope tension or check if the platform is balanced properly.
Enhancing Your Project
Adding LEDs for Display
Install LED lights to make it visually appealing. Connect them in parallel with the motor circuit.
Decorating for Visual Appeal
Paint or decorate the base and platform to make it look like a real car parking system.
Presenting Your Project
Explaining the Mechanism
Be ready to explain how the DC motor powers the pulley and how the lift moves.
Demonstrating Functionality
Show the lift moving up and down with the switch, and talk about any challenges you overcame during the build.
Conclusion
Making a car parking lift using a DC motor is not just a fun school project—it’s a hands-on way to understand basic mechanics, electronics, and design. Plus, it’s super satisfying to see something you built actually work! Whether you’re aiming for top grades or just love building stuff, this project is sure to impress.
thank you very much visiting my website get more content http://Click Here