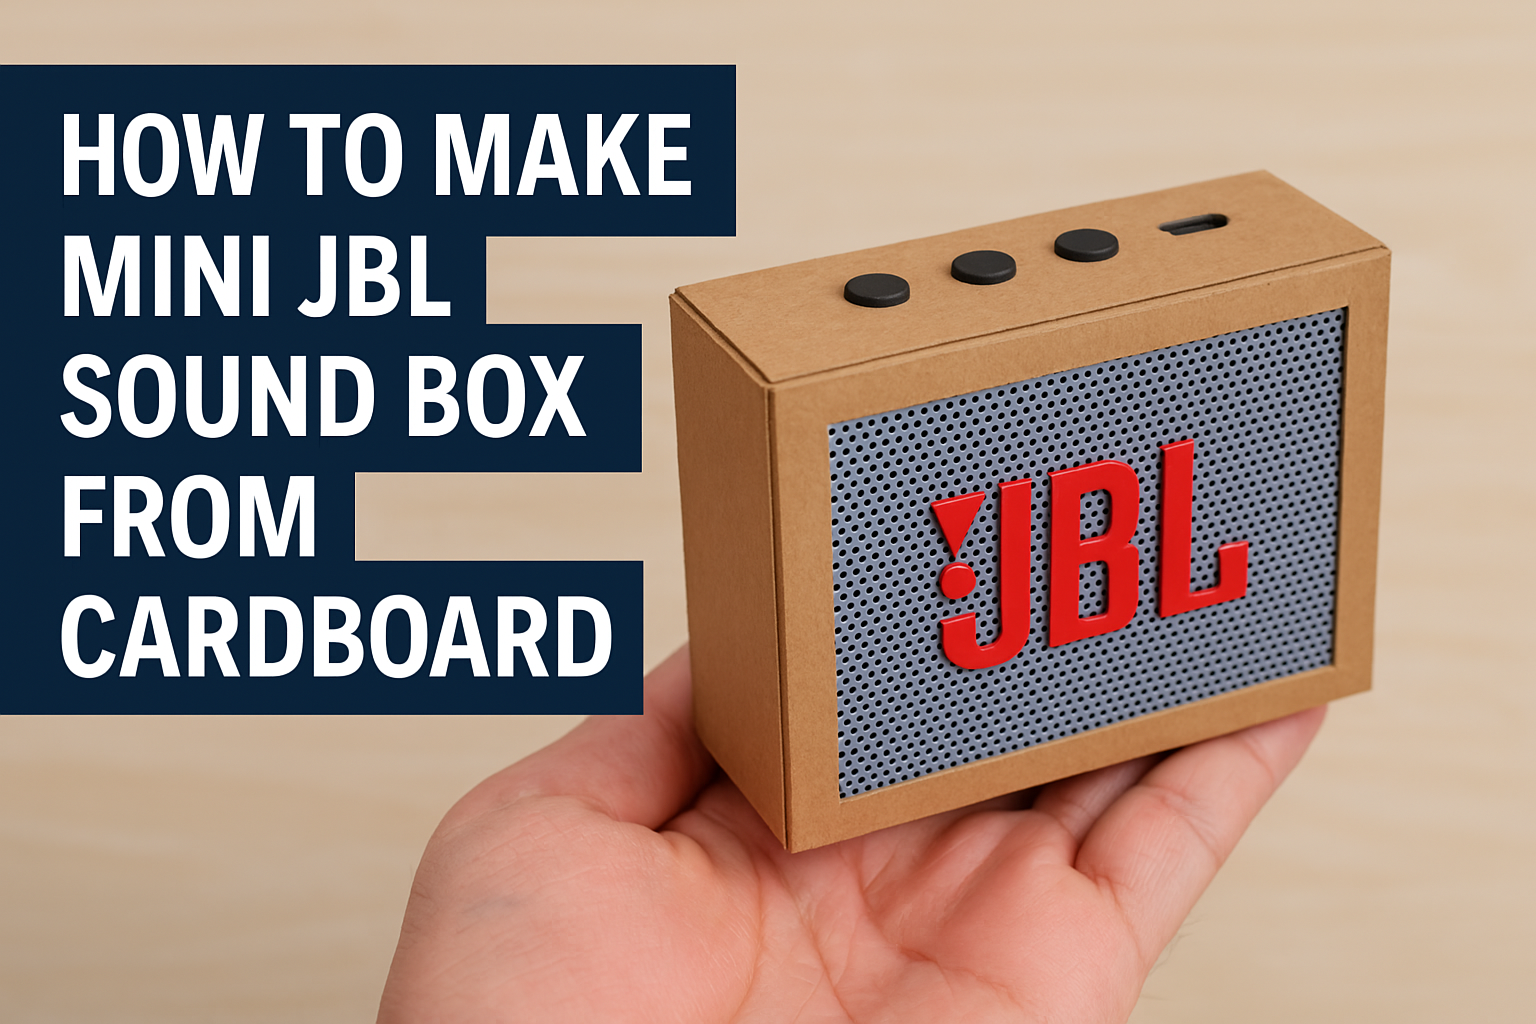
How To Make Mini JBL Sound Box Project From Cardboard
Introduction
So, you love music and enjoy DIY projects? Perfect! Let’s merge both worlds by making your own Mini JBL Sound Box from cardboard. It might sound wild at first—cardboard and JBL in the same sentence—but trust me, with a little effort, creativity, and some basic electronics, you’ll have a cool speaker that not only plays great tunes but looks amazing too.

Tools and Materials You’ll Need
- Cardboard (sturdy and thick)
- Bluetooth speaker module (available online)
- Rechargeable battery (like a 3.7V Li-ion)
- Wires and a small switch
- Hot glue gun or strong glue
- Cutter or scissors
- Ruler and pencil
- Decorative paper or paint (optional)
You don’t need a full workshop—just the basics from a craft store or your toolbox.
Step-by-Step Guide to Building the Mini JBL Sound Box
Designing the Speaker Box
First up, sketch your mini sound box on paper. Measure the size of your Bluetooth module and speaker. Then design a box that’ll snugly hold all the components. Make sure you plan out where buttons, USB charging ports, and speakers will go.
Cutting the Cardboard
Now take your cardboard and start measuring and marking using a ruler and pencil. You’ll need pieces for:
- Front and back panels
- Two side panels
- Top and bottom pieces
Cut them carefully with a utility knife or sharp scissors. Clean edges make your project look way more professional.
Assembling the Frame
Using your glue gun or any strong adhesive, start assembling the box. Glue all sides firmly and let them dry for a few minutes. Don’t rush this part—a strong structure ensures better durability and sound quality.
Installing the Speaker Module
Once the frame is set, place the Bluetooth module and speaker unit inside. Connect the speaker to the module using wires. Secure everything with glue or small brackets. Leave some space to access the switch and charging port.
Adding Power Supply
Connect the battery to the Bluetooth module. Make sure you follow polarity—red to red, black to black. Add a small switch to power on/off. If your module has a built-in charging port, you’re golden!
Creating the Speaker Grill
To give it that “JBL” look, cut out a speaker hole in the front panel. Cover it with mesh fabric or a metal net from an old speaker. You can even cut out the JBL logo from a printout and stick it on the front.
Finishing Touches
Paint your sound box or wrap it with vinyl or gift paper. Add any customizations you like—LED lights, labels, or stickers. Make it your JBL!
Tips for Better Sound Quality
- Place the speaker near the front for better projection.
- Add soft foam or cotton inside to reduce vibration.
- Seal all edges properly to avoid sound leakage.
Benefits of Making Your Own Mini JBL Sound Box
- Cost-Effective: It’s way cheaper than buying a brand-new speaker.
- Hands-On Learning: Great for electronics beginners.
- Customization: Choose the shape, size, and look!
Common Mistakes to Avoid
- Using thin cardboard—it can’t hold components well.
- Not securing wires, which may lead to disconnections.
- Forgetting ventilation, which can cause overheating.
Safety Precautions
- Always use cutters carefully—cut away from your body.
- Handle batteries with care—don’t short-circuit them.
- Avoid overheating the glue gun.
Final Testing and Troubleshooting
Charge your mini sound box and pair it with a phone. Play some music to test the sound quality. If there’s static or no sound, recheck wiring and battery.
Conclusion
Building a Mini JBL Sound Box from cardboard is fun, affordable, and educational. You don’t need a lab or big budget—just some creativity and patience. Whether you want to show it off or actually use it as a travel speaker, this DIY project delivers the goods.
Thank you very much visiting my website get more Contenthttp://Click Here