Introduction
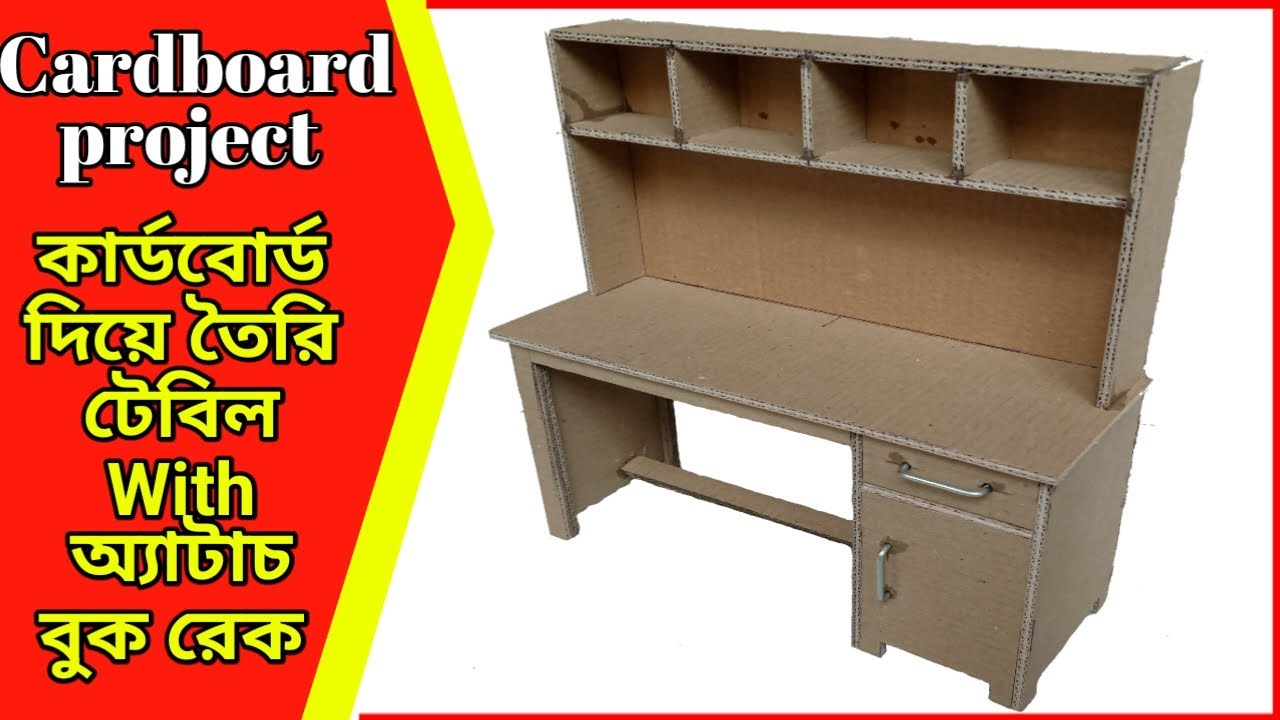
In this article, we will guide you on how to create a school project book rack with a table using cardboard. This DIY project is a great way to showcase your creativity and build something functional for your school projects. By following the steps outlined below, you can create a unique and budget-friendly book rack with a table that will impress your classmates and teachers.
Materials Required
Before getting started, gather the following materials:
- Cardboard sheets
- Ruler
- Pencil
- Craft knife or scissors
- Adhesive (glue or tape)
- Acrylic paint or spray paint
- Paintbrushes
- Sandpaper
- Decorative items (optional)
Planning and Design
- Determine the size of the book rack and table you want to create. Consider the available space and the number of books you wish to store.
- Sketch out your design on paper, including the dimensions and overall structure. This will serve as your guide during the construction process.
Measuring and Cutting the Cardboard
- Lay out the cardboard sheets on a flat surface.
- Use a ruler and pencil to measure and mark the dimensions for the book rack and table components.
- Carefully cut along the marked lines using a craft knife or scissors.
Assembling the Book Rack
- Start by assembling the vertical sides of the book rack. Apply adhesive to the edges of the cardboard pieces and join them together.
- Attach the horizontal shelves to the vertical sides, ensuring they are evenly spaced.
- Apply adhesive to the edges and joints to reinforce the structure.
Reinforcing the Structure
- Cut additional strips of cardboard to create corner braces for added stability.
- Attach these corner braces to the inside corners of the book rack using adhesive.
Adding the Tabletop
- Measure and cut a piece of cardboard for the tabletop.
- Attach the tabletop to the book rack structure using adhesive, ensuring it is securely fastened.
Sanding and Painting
- Use sandpaper to smooth out any rough edges or surfaces on the book rack and table.
- Apply a primer if desired, and then paint the entire structure with your chosen colors. Let it dry completely.
Final Touches
- Once the paint has dried, you can add decorative elements like stickers, stencils, or drawings to personalize your book rack.
- Place the book rack in a suitable location in your room, ensuring it is stable and easily accessible.
Conclusion
Creating a school project book rack with a table using cardboard is a fun and creative DIY project. By following the steps outlined in this article, you can design and construct a unique and functional piece for your school projects. This project allows you to showcase your creativity while also providing a practical solution for organizing and displaying your books.
Thank you very much Visiting For Website http://creativitytopper.com
- How To Make DIY Mini bus Project From Cardboard at home. - May 8, 2024
- How To Make Humidifier Spray Module / Mist Maker Project . - April 27, 2024
- How To Make a New Model Subwoofer Box Project by Cardboard - April 15, 2024