
DIY Mini Bus Project from Cardboard: A Step-by-Step Guide
Introduction:
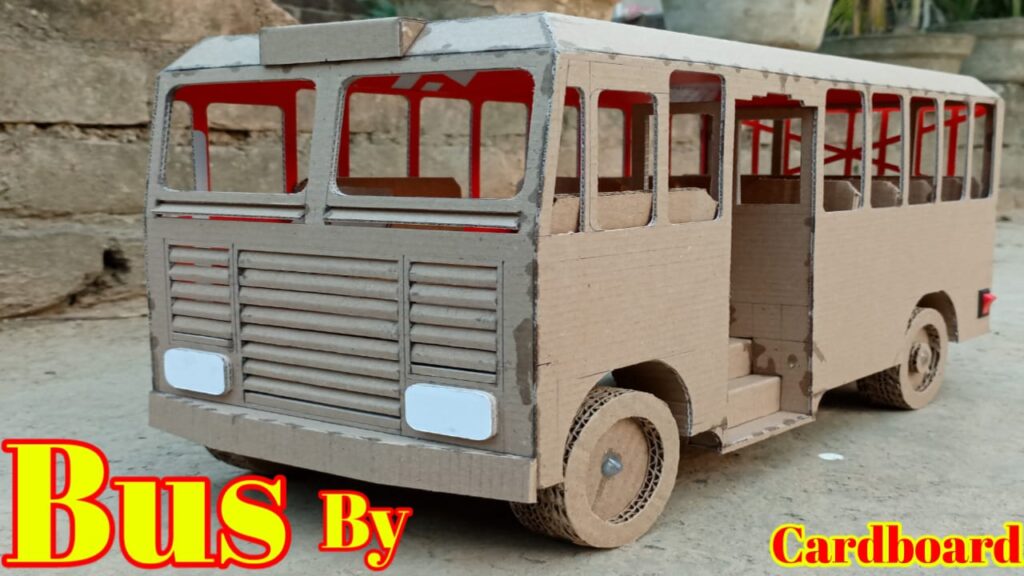
Creating a DIY mini bus from cardboard is a fun and creative project that can be enjoyed by both kids and adults alike. Not only does it provide an opportunity to explore your artistic skills, but it also encourages recycling and upcycling of materials. In this step-by-step guide, we will walk you through the process of making your own mini bus using simple materials that you can find around your home.
Materials Needed:
- Cardboard box (large enough to cut out the shape of a mini bus)
- Scissors or utility knife
- Ruler
- Pencil
- Hot glue gun and glue sticks
- Acrylic paint or markers
- Paintbrushes
- Optional: Decorative materials such as stickers, buttons, or colored paper
Step 1:
Designing the Mini Bus Begin by sketching the design of your mini bus on the cardboard box using a pencil and ruler. You can either draw the outline of a traditional mini bus or get creative and design your own unique shape. Consider the size of the cardboard box and how big you want your mini bus to be. Once you are satisfied with your design, use the scissors or utility knife to carefully cut along the outline.
Step 2:
Creating the Structure After cutting out the shape of the mini bus from the cardboard, fold along the edges to create the structure of the bus. Use the hot glue gun to secure the folds in place, ensuring that the bus holds its shape. Pay special attention to the corners and edges to prevent any gaps or weak spots in the structure. Once the glue has dried, your mini bus should be sturdy and ready for decoration.
Step 3:
Decorating the Mini Bus Now comes the fun part – decorating your mini bus! Use acrylic paint or markers to add color and detail to the exterior of the bus. You can paint it in a single color for a classic look, or get creative and add patterns, stripes, or even a fun design inspired by your favorite mini bus. Let your imagination run wild!
Once the paint has dried, you can further enhance the appearance of your mini bus by adding decorative elements such as stickers, buttons, or colored paper. Use the hot glue gun to attach these embellishments securely to the surface of the bus, taking care not to cover any important details or obstruct the windows and doors.
Step 4:
Adding Wheels and Details No mini bus would be complete without wheels! Cut out four circles from the cardboard box to create the wheels of your mini bus. You can use a smaller circular object, such as a bottle cap or lid, as a template to ensure that the wheels are uniform in size. Once you have cut out the circles, use the hot glue gun to attach them to the bottom of the bus, evenly spaced apart.
Next, add any additional details to your mini bus, such as headlights, windows, or a license plate. You can use markers, paint, or colored paper to create these features and bring your mini bus to life. Get creative and have fun with it!
Step 5:
Final Touches Once you are satisfied with the appearance of your mini bus, take a step back and admire your handiwork! Make any final adjustments or additions as needed, ensuring that every detail is just right. Once you are happy with how your mini bus looks, it’s time to put it on display for all to see.
Conclusion:
Making a DIY mini bus from cardboard is a rewarding and enjoyable project that allows you to unleash your creativity while also promoting recycling and upcycling. By following these simple steps, you can create your own mini bus masterpiece that will delight and inspire others. So gather your materials, roll up your sleeves, and get ready to embark on a creative adventure.
Thank you very much visiting for websitehttps://creativitytopper.com
- How To Make DIY Mini bus Project From Cardboard at home. - May 8, 2024
- How To Make Humidifier Spray Module / Mist Maker Project . - April 27, 2024
- How To Make a New Model Subwoofer Box Project by Cardboard - April 15, 2024