Are you looking for an exciting and creative school project? If you want to combine robotics, craftsmanship, and a tasty treat, building a robotic ice cream car made out of cardboard is a perfect choice. This engaging project allows you to design and construct a miniature vehicle capable of serving delicious ice cream. In this article, we will guide you through the process of creating your very own robotic ice cream car, step by step.
Introduction
School projects provide an excellent opportunity for students to explore their creativity and develop their technical skills. The robotic ice cream car project not only introduces the concepts of engineering and programming but also combines them with the joy of making and sharing ice cream.
Understanding the Robotic Ice Cream Car Project
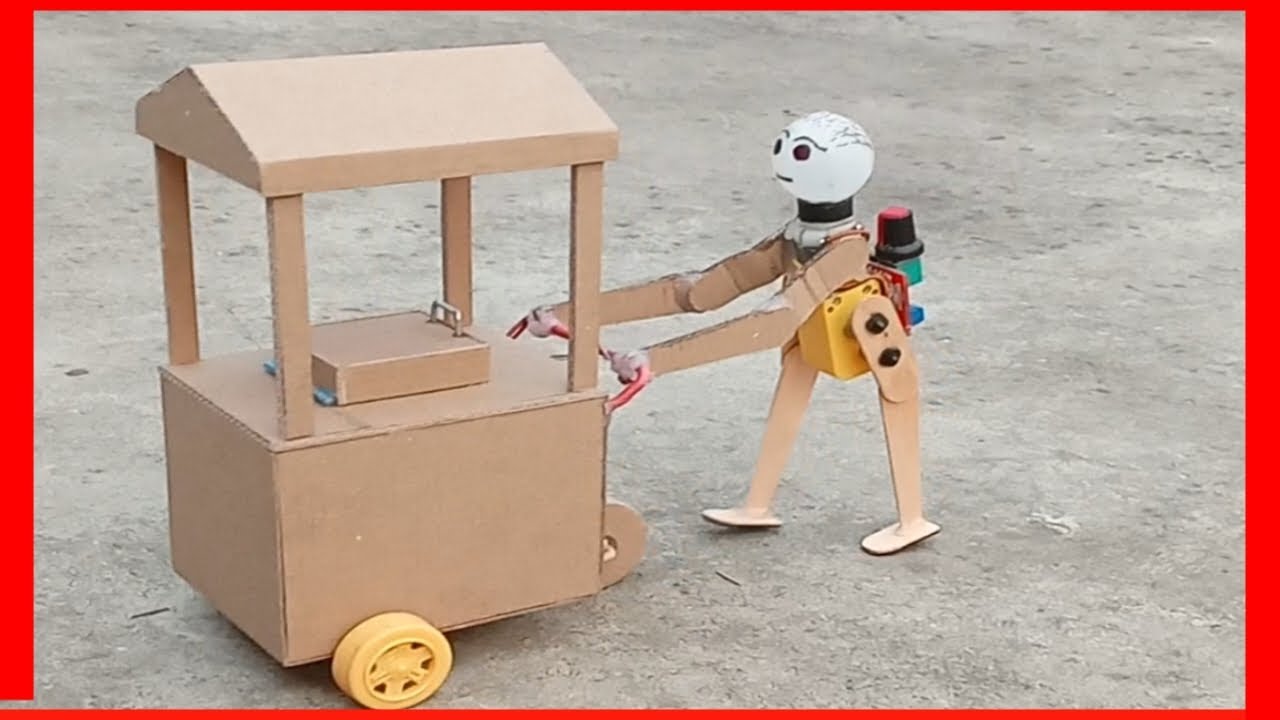
The robotic ice cream car is a small-scale vehicle equipped with a motorized chassis, an ice cream dispenser, and robotic components controlled by an Arduino board. The car is designed to move autonomously while serving ice cream to its eager customers.
Gathering the Materials
Before diving into the construction process, it’s essential to gather all the necessary materials. Here’s a list of items you’ll need:
- Cardboard sheets
- Scissors or a craft knife
- Hot glue gun and glue sticks
- Small wheels with axles
- DC motor
- Battery holder
- Servo motor
- Arduino board
- Jumper wires
- Ice cream container
- Plastic spoons
- Paints, markers, or decorative materials
Make Robotic Ice Cream Car School Project By Cardboard.
Building the Chassis
The chassis serves as the foundation for the robotic ice cream car. Let’s start by constructing it:
Step 1: Cutting and assembling the cardboard base
Begin by cutting out a rectangular piece of cardboard for the car’s base. This will determine the car’s size and shape. Make sure the dimensions are suitable for housing all the components.
Next, cut additional cardboard strips to create the sides of the car. Use a hot glue gun to attach the strips to the base, forming a box-like structure.
Step 2: Attaching the wheels
To enable the car to move, attach small wheels to the base using axles. Ensure the wheels are securely fixed, allowing smooth and stable movement.
Step 3: Adding the motor and battery holder
Position the DC motor at the back of the car, aligning it with the wheels. Use hot glue or adhesive tape to secure it in place. Attach the battery holder near the motor, ensuring easy access for battery replacement
Creating the Ice Cream Dispenser
The ice cream dispenser is a crucial component of the robotic car, as it allows the vehicle to serve delicious frozen treats. Let’s explore how to create it:
Step 1: Constructing the ice cream container
Take a small cardboard box or container and cut out a rectangular opening on one side. This opening will serve as the ice cream dispensing area. Make sure it’s large enough to accommodate a scoop of ice cream.
Step 2: Installing the servo motor
Attach a servo motor to the bottom of the container using hot glue or adhesive tape. The servo motor will control the movement of the dispensing mechanism.
Step 3: Connecting the dispensing mechanism
Create a lever mechanism using cardboard or popsicle sticks. Attach one end of the lever to the servo motor and the other end to a spoon or a small scoop. When the servo motor rotates, it will move the lever, allowing the ice cream to be scooped and dispensed.
Adding the Robotic Components
The robotic elements of the ice cream car are controlled by an Arduino board. Let’s integrate these components:
Step 1: Incorporating the Arduino board
Position the Arduino board inside the car’s chassis. Ensure it is securely mounted and easily accessible for programming and wiring.
Step 2: Connecting the motor and servo to the board
Using jumper wires, connect the DC motor to one of the Arduino’s digital pins. This connection enables the motor to receive commands for forward and backward movement. Similarly, connect the servo motor to a dedicated pin on the Arduino board.
Step 3: Programming the Arduino
Write a program in the Arduino IDE that controls the movement of the car and activates the ice cream dispensing mechanism. The program should include commands to drive the motor and control the servo motor based on desired actions and conditions.
Decorating and Personalizing the Car
Now that the functional components are in place, it’s time to unleash your creativity and decorate the robotic ice cream car. Use paints, markers, or any decorative materials to bring your vehicle to life. You can give it a vibrant color scheme, add stickers or patterns, and even design a catchy logo for your ice cream business.
Testing and Troubleshooting
Before presenting your robotic ice cream car project, thoroughly test its functionality. Ensure that the car moves smoothly, the ice cream dispenser works as intended, and the Arduino programming operates correctly. If you encounter any issues, troubleshoot by checking the wiring, programming code, or component connections.
Conclusion
Congratulations on completing your own robotic ice cream car project! Through this hands-on experience, you’ve learned about robotics, craftsmanship, and programming while enjoying the process of making and sharing delicious ice cream. This project showcases the intersection of creativity and technology, making it an ideal school project to engage and inspire students.
Thank you very much Visiting For Websitehttp://creativitytopper.com
- How To Make DIY Mini bus Project From Cardboard at home. - May 8, 2024
- How To Make Humidifier Spray Module / Mist Maker Project . - April 27, 2024
- How To Make a New Model Subwoofer Box Project by Cardboard - April 15, 2024