Making an autorickshaw out of cardboard can be a fun and creative project. Not only will it allow you to exercise your artistic and problem-solving skills, but it can also be a great way to repurpose materials that would otherwise go to waste. In this article, we’ll go over the steps involved in creating an amazing autorickshaw out of cardboard.
Making an autorickshaw out of cardboard can be a fun and creative activity. Not only is it a great way to pass the time, but it can also be an excellent opportunity to showcase your artistic and crafting skills. Here’s a step-by-step guide on how to make an amazing autorickshaw by using cardboard.
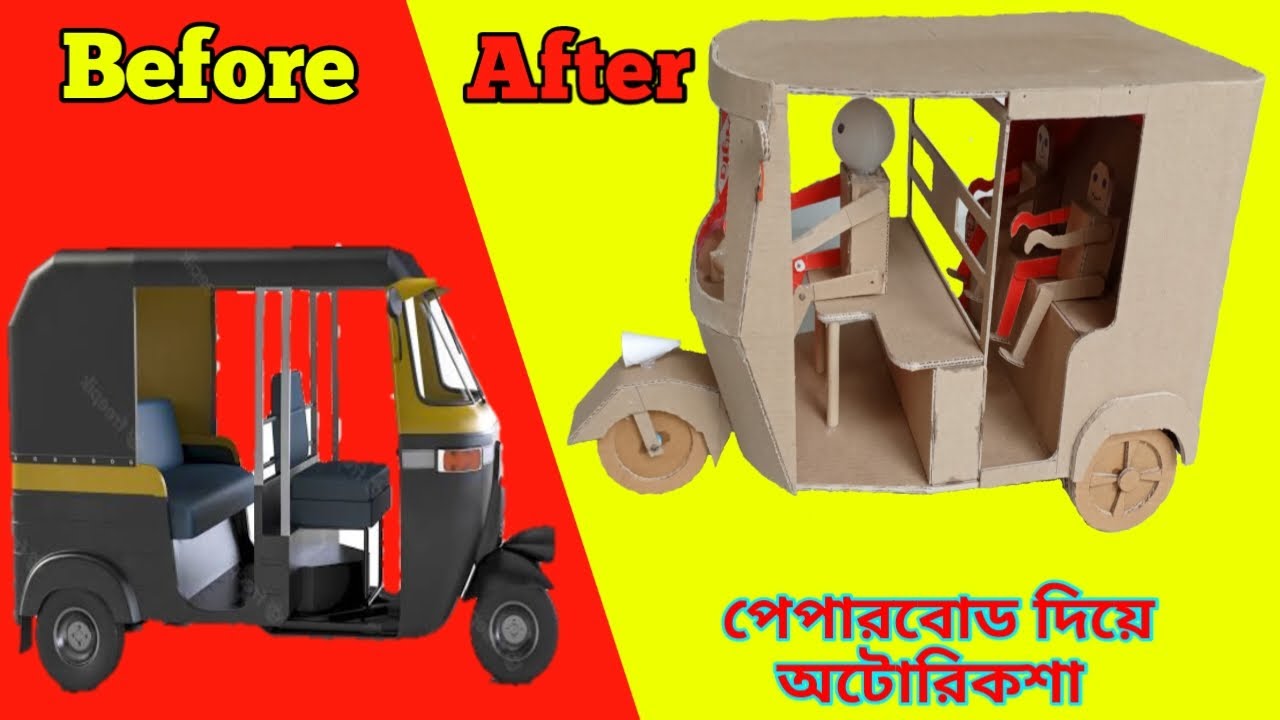
Make Amazing Autorickshaw by cardboard
Materials Needed:
- Cardboard boxes of various sizes
- Scissors
- Glue or tape
- Paint and brushes
- Markers or pens
- Wheels (optional)
Step 1: Planning and Sketching Before starting your autorickshaw, it’s important to plan and sketch out your design. Think about the size, shape, and color of your autorickshaw. You can use the internet for inspiration or come up with your own design. Once you have a clear idea of what you want to make, sketch out your design on paper.
Step 2: Cutting the Cardboard Using scissors, cut out the different parts of the autorickshaw from cardboard boxes. This can include the body, roof, and wheels. Be sure to cut out the pieces accurately and use a ruler if necessary. It’s important to make sure that the pieces fit together properly before moving on to the next step.
Step 3: Assembling the Autorickshaw Using glue or tape, assemble the different parts of the autorickshaw together. Start by attaching the body to the wheels, then add the roof and any other details, such as headlights or a windshield. It’s important to let the glue dry before moving on to the next step.
Make Amazing Autorickshaw by cardboard
Step 4: Painting and Decorating Once the autorickshaw is assembled, it’s time to paint and decorate it. Use paint and brushes to add color and details to your autorickshaw. You can also use markers or pens to add additional details such as the name of the driver or the license plate number. Get creative and have fun with it!
Step 5: Adding Wheels (Optional) If you want your autorickshaw to move, you can add wheels to the bottom. You can use small toy wheels or cut out circles from cardboard and attach them to the bottom of the autorickshaw. This will allow you to push the autorickshaw around like a toy.
In conclusion, making an amazing autorickshaw out of cardboard can be a fun and rewarding project. By following these steps, you can create a unique and creative autorickshaw that you can display or play with. So gather your materials and get started on your very own cardboard autorickshaw!
Thank you very much Visiting for Website http://creativitytopper.com
- How To Make DIY Mini bus Project From Cardboard at home. - May 8, 2024
- How To Make Humidifier Spray Module / Mist Maker Project . - April 27, 2024
- How To Make a New Model Subwoofer Box Project by Cardboard - April 15, 2024