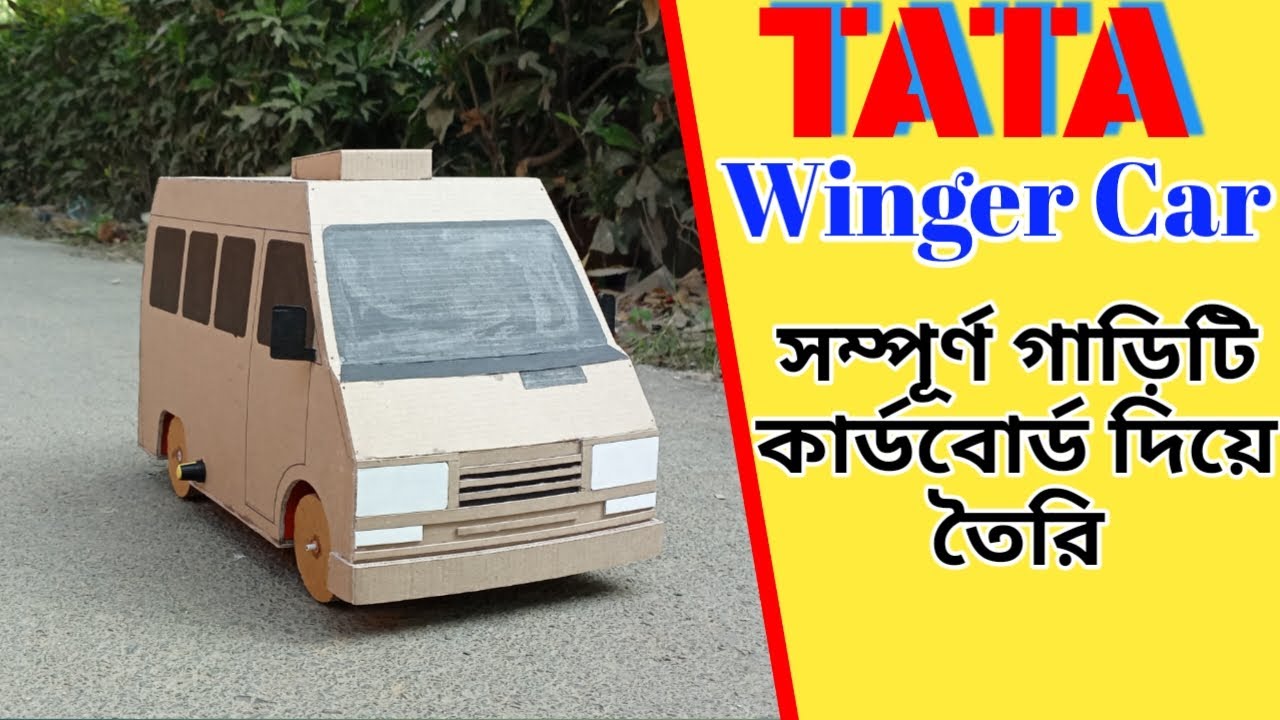
Making an Remote Control TATA Winger car from cardboard is a fun and challenging project. It requires patience, attention to detail, and a few basic materials. In this article, we will guide you through the process of creating your own Remote Control TATA Winger car using cardboard.
How To Make Remote Control TATA Winger Car By Cardboard
Materials needed:
- Cardboard sheets
- Scissors
- Glue
- Ruler
- Pencil
- RC car kit
- Paints (optional)
Make Remote Control TATA Winger Car By Cardboard
Step 1: Designing the car The first step in making an Remote Control TATA Winger car is to create a design plan. You can find a blueprint or a picture of a TATA Winger online as a reference. Use a ruler and pencil to draw the outline of the car on cardboard sheets. Cut out the pieces using scissors.
Step 2: Assembling the car body Start by assembling the car’s body. Use glue to join the pieces together. Make sure the parts are aligned correctly to ensure the final product is stable. Allow the glue to dry before proceeding to the next step.
Step 3: Making the wheels Next, make the wheels of the car. Cut out four circles from cardboard sheets. Use a compass or a round object to trace the circles. Make sure they are of equal size. Cut out the center of the circles, leaving only the rim. Glue the rims onto the Remote Control car kit’s wheels.
Step 4: Attaching the wheels Attach the wheels to the car’s body using glue. Make sure they are aligned correctly to ensure the car moves smoothly. Allow the glue to dry before proceeding to the next step.
Make Remote Control TATA Winger Car By Cardboard
Step 5: Adding the electronics Now it’s time to add the Remote Control car kit’s electronics to the car. Follow the manufacturer’s instructions to assemble the car’s motor, battery, and controller. Attach the electronics to the car’s body using glue or tape.
Step 6: Testing the car Once you have assembled the car, test it to ensure everything is working correctly. Turn on the controller and check if the car moves forward, backward, left, and right. If there are any issues, double-check the wiring and connections.
Step 7: Painting (optional) If you want to make your Remote Control TATA Winger car look more realistic, you can paint it. Choose the colors you want and use acrylic paints to paint the car. Allow the paint to dry before testing the car again.
Conclusion: Making an Remote Control TATA Winger car from cardboard is a fun and rewarding project. It requires patience and attention to detail, but the end result is a unique and personalized RC car that you can be proud of. Follow the steps outlined in this article, and you’ll be on your way to creating your own RC TATA Winger car in no time
Thank You Very much Visiting for website http://creativitytopper.com
- How To Make DIY Mini bus Project From Cardboard at home. - May 8, 2024
- How To Make Humidifier Spray Module / Mist Maker Project . - April 27, 2024
- How To Make a New Model Subwoofer Box Project by Cardboard - April 15, 2024