If you’re looking for a fun and creative school project, building a hydraulic lift for car servicing out of cardboard could be just the thing. This project will require some basic materials and tools, but with some patience and persistence, you can create a functional and visually impressive hydraulic lift. Here’s a step-by-step guide to help you get started.
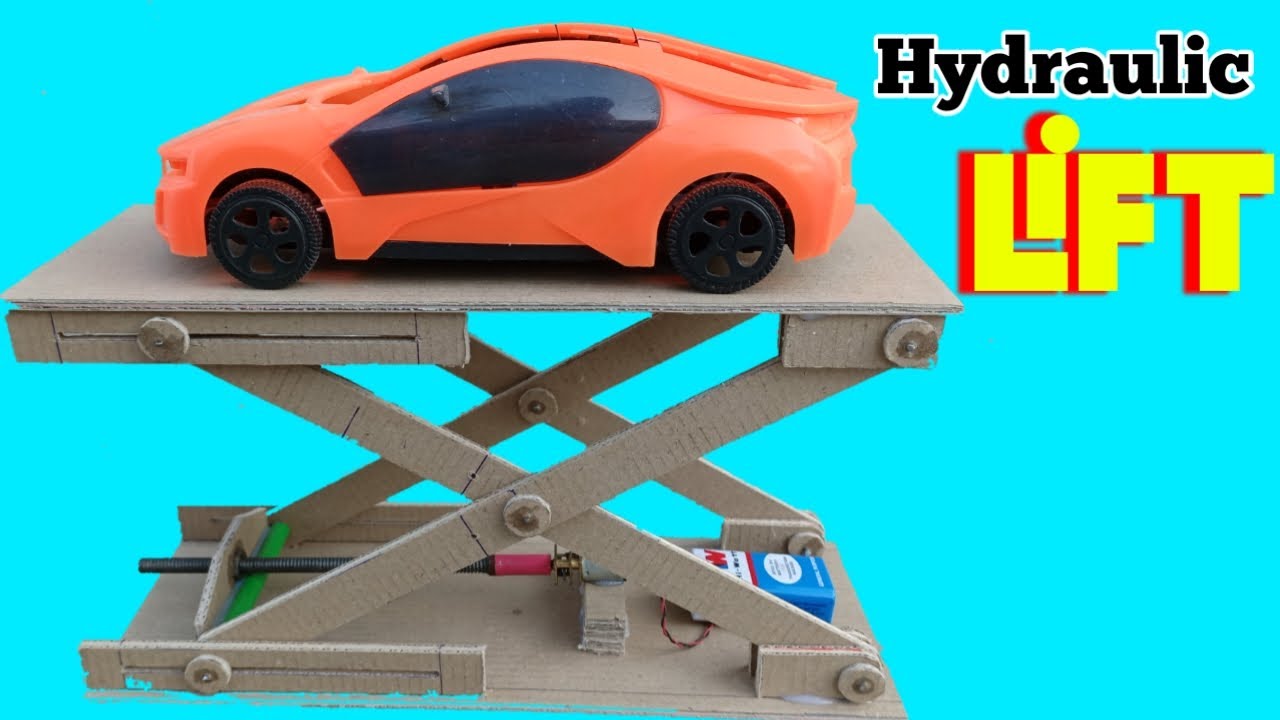
Make School Project Car Servicing Hydraulic Lift By Cardboard
Materials:
- Cardboard boxes
- Craft knife or scissors
- Ruler
- Hot glue gun
- Dowels or chopsticks
- Rubber bands
- Syringes
- Tubing
- Cardboard or foam board
Make Car Servicing Hydraulic Lift Project By Cardboard
Step 1: Design the Lift Start by sketching out your design on paper. Consider the size of the lift and how it will be used. You may also want to think about the weight capacity and the materials you’ll need. Once you have a clear plan, you can start cutting your cardboard pieces.
Step 2: Cut the Cardboard Use a ruler and craft knife or scissors to cut the cardboard into the appropriate shapes and sizes. You’ll need to create a base, two lifting arms, and a crossbar to hold the arms in place. Cut small notches into the cardboard where the dowels will be inserted to create the hinge points.
Step 3: Assemble the Lifting Arms Insert the dowels or chopsticks into the notches to create the hinge points for the lifting arms. Use hot glue to secure the dowels in place. Attach the rubber bands to the arms and the base to create tension and keep the arms in the upright position.
Step 4: Add the Crossbar Cut a piece of cardboard or foam board to the appropriate size for the crossbar. Use hot glue to attach it to the top of the lifting arms. Make sure the crossbar is centered and level.
Make School Project Car Servicing Hydraulic Lift By Cardboard
Step 5: Add the Hydraulic System To create the hydraulic system, you’ll need syringes, tubing, and some hot glue. Cut the tubing to the appropriate lengths and attach one end to the syringe and the other end to the lifting arm. Use hot glue to secure the tubing in place.
Step 6: Test the Lift Once you’ve assembled the lift, it’s time to test it out. Fill the syringes with water and slowly depress the plunger to lift the arms. You should see the crossbar rise and the lifting arms extend. If everything is working properly, you can move on to the final step.
Step 7: Decorate the Lift Now that your hydraulic lift is working, you can add some finishing touches. Use paint or markers to decorate the lift and make it look more like a real hydraulic lift. You could also add some details like caution signs or a control panel.
In conclusion
building a hydraulic lift for car servicing out of cardboard is a fun and creative school project that can be accomplished with some basic materials and tools. By following these steps and using your imagination, you can create a functional and visually impressive hydraulic lift that will be sure to impress your classmates and teacher. Good luck and have fun.
Thank you very much Visiting For Website http://creativitytopper.com
- How To Make DIY Mini bus Project From Cardboard at home. - May 8, 2024
- How To Make Humidifier Spray Module / Mist Maker Project . - April 27, 2024
- How To Make a New Model Subwoofer Box Project by Cardboard - April 15, 2024